Table of Contents
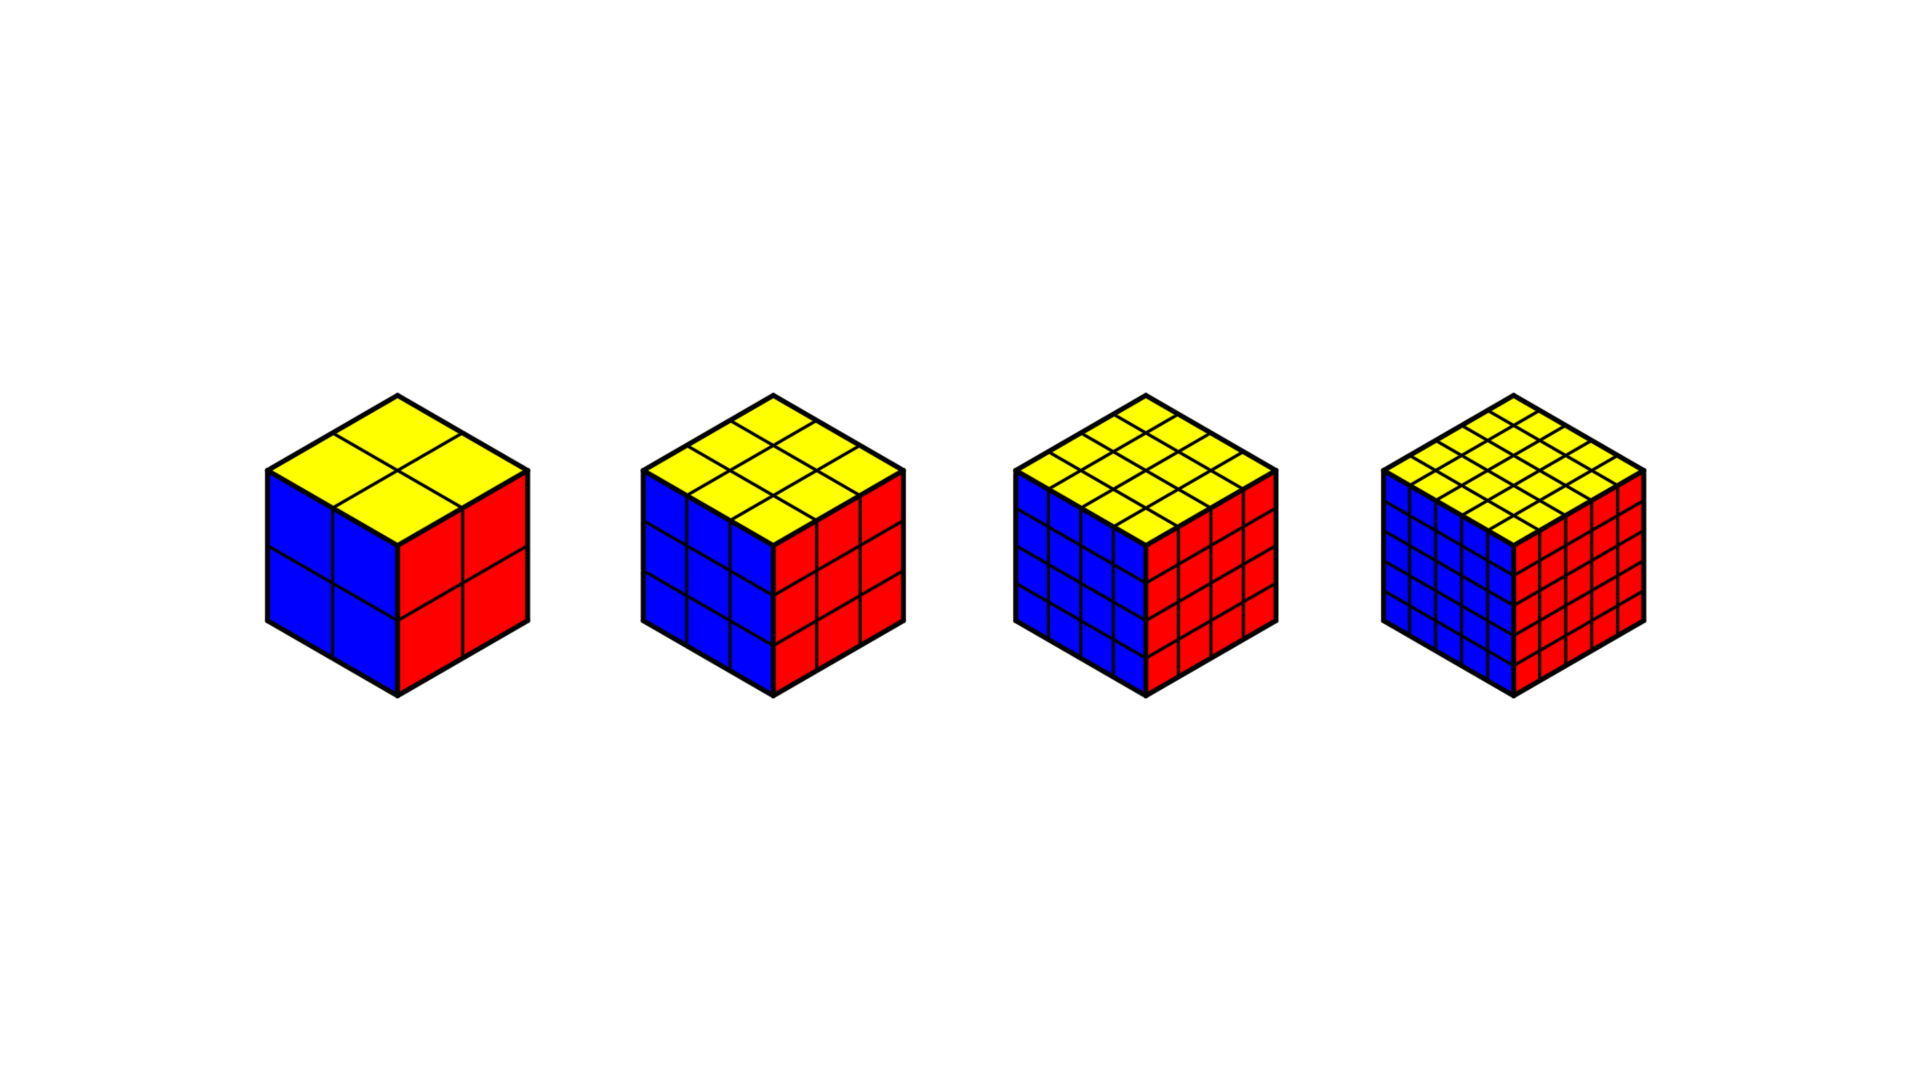
3×3 Rubik's Cube formula
All States, Transformations and Solving Steps for the Top Face of a 3×3 Rubik’s Cube
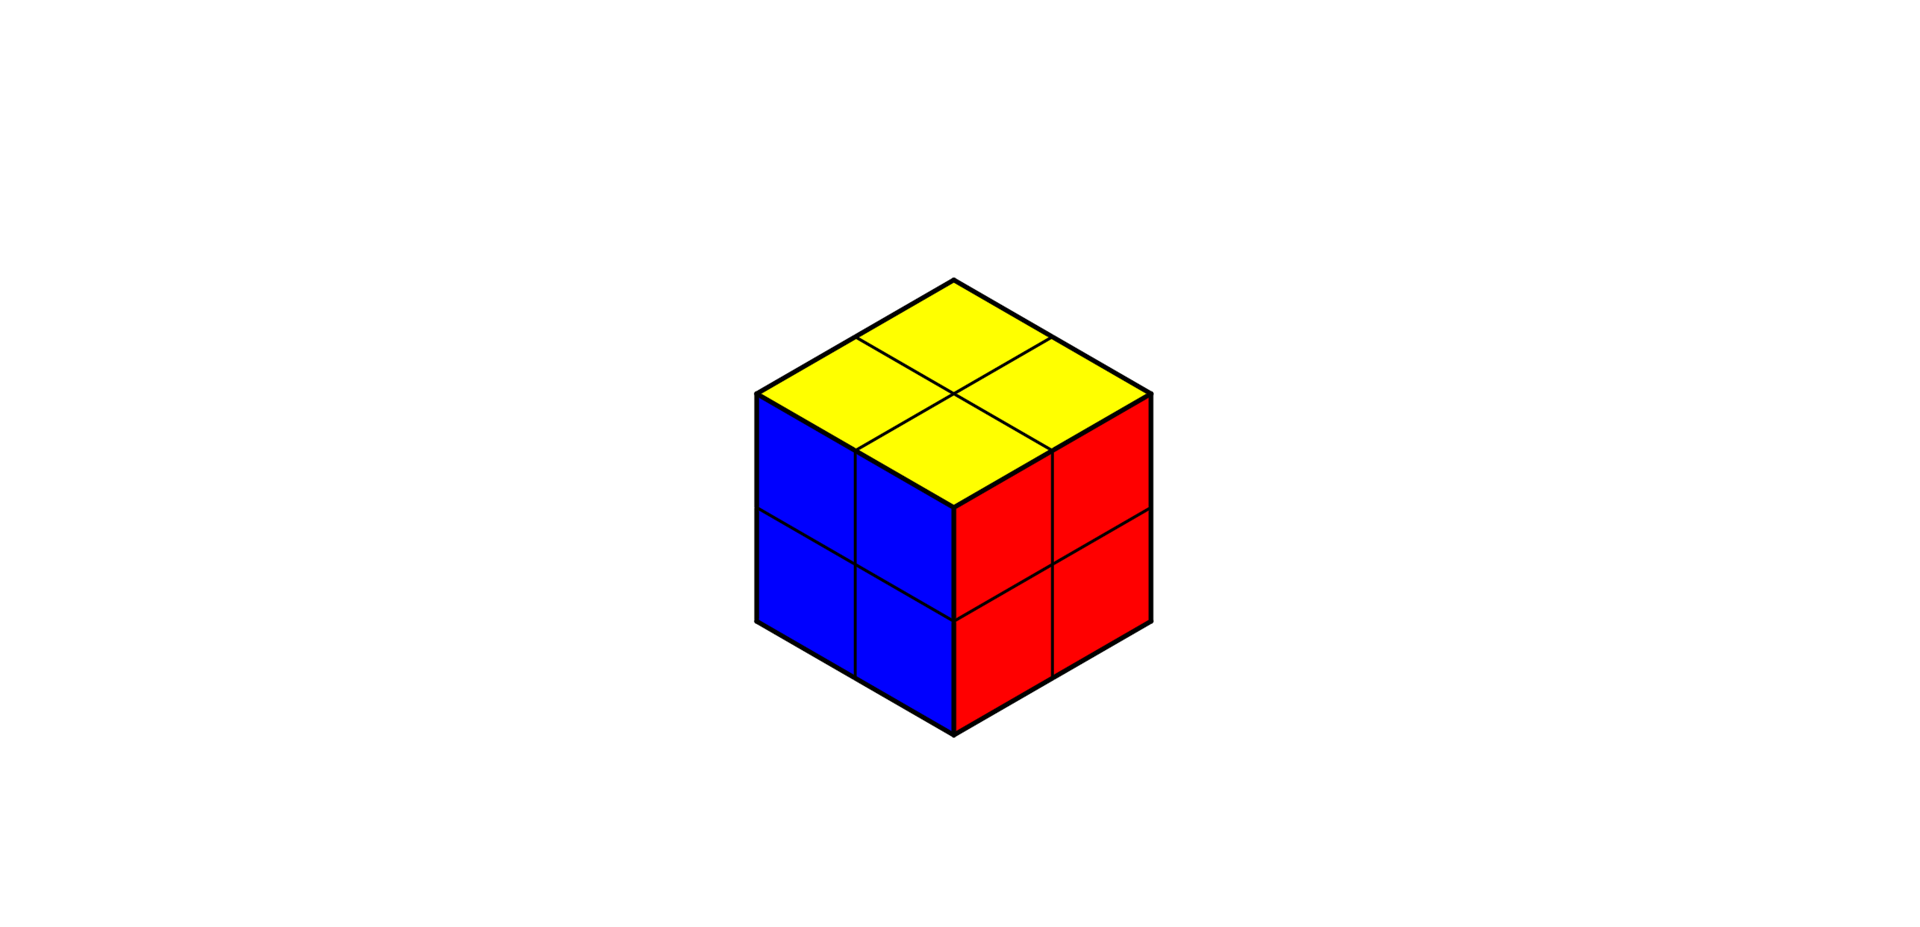
2×2 Rubik's Cube formula
4×4 Rubik's Cube formula
5×5 Rubik's Cube formula
Rubik's Cube formula
1. Basics of the Rubik’s Cube ⚓︎
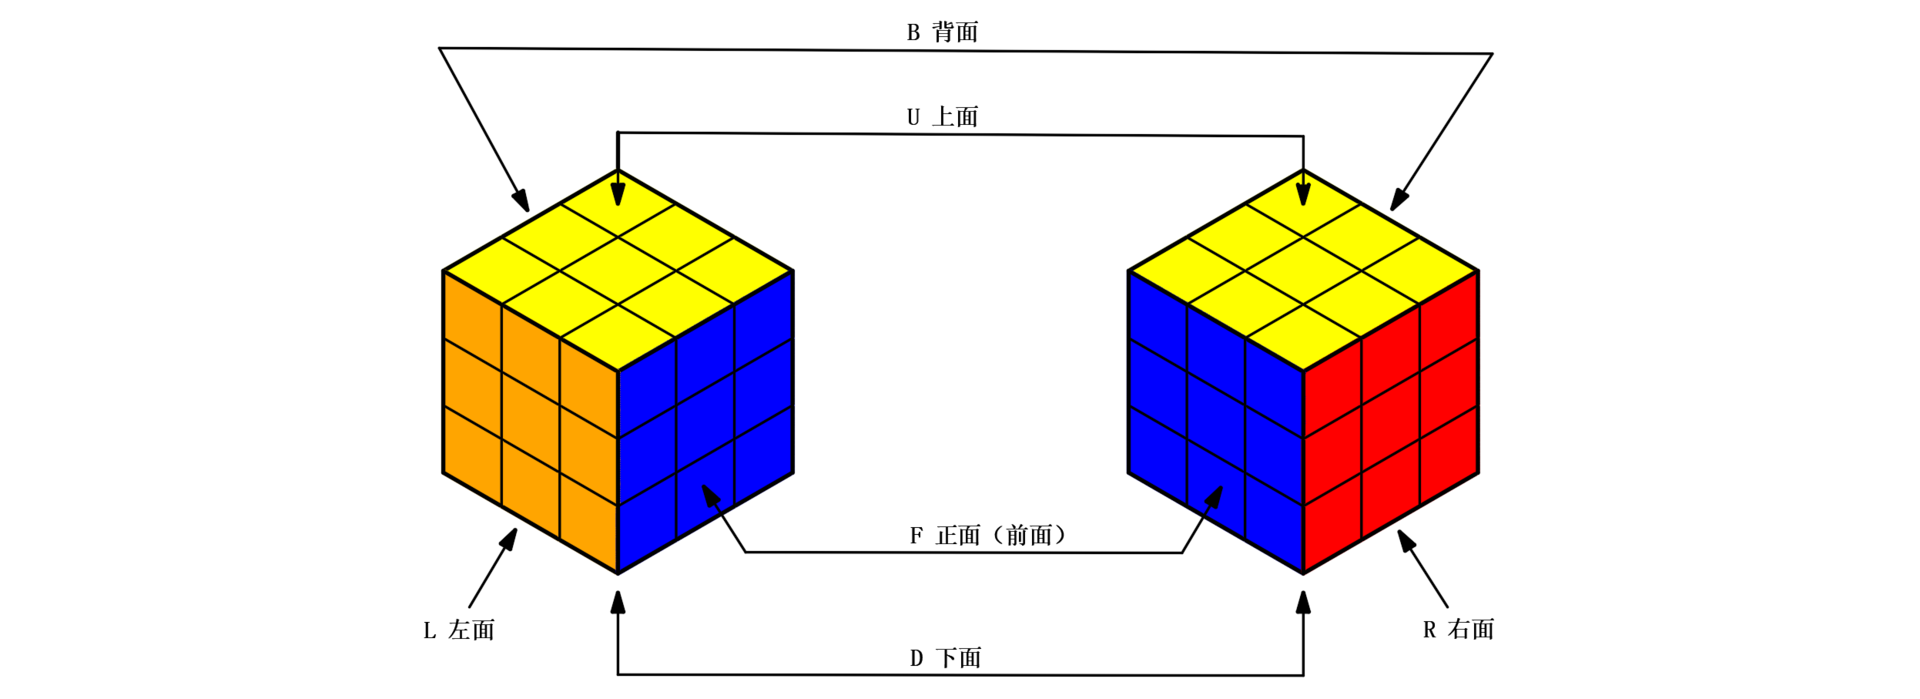
1.1 Rotating Surface ⚓︎
| Formula | Rotating Surface |
|---|---|
| U | Up |
| D | Down |
| L | Left |
| R | Right |
| F | Front |
| B | Back |
1.2 Rotation Direction and Angle ⚓︎
| Formula | Rotation direction and Angle |
|---|---|
| F | Rotate the Front face clockwise 90° |
| F’ | Rotate the Front face counterclockwise 90° |
| F2 | Rotate the Front face clockwise 180° (F2 = F’2) |
| M₂R | Rotate only the 2nd right inner layer clockwise 90° |
| T₂R | Rotate the front two right layers together clockwise 90° |
1.3 International Color Scheme ⚓︎
- Note: Generally, we choose the front side as the front and the white surface as the bottom.
2. Solve the Bottom Layer ⚓︎
2.1 Solve the Bottom Cross ⚓︎
Formula 1-2: R' D R (Right side) / L D L' (Left side)
The process of solving the bottom layer cross involves two steps: solving the bottom layer cross itself and aligning the colors of the side edges. The situations for solving the bottom layer cross are diverse and the process is flexible. There is no unified formula. The general approach can be divided into two types:
- Method 1: Solve the bottom cross and align side edge colors simultaneously (white center as the top face)
- First rotate one white edge piece to the white area of the top face, and align the other color of this edge piece with the color of the side center piece.
- Find the edge pieces with white and the same color as the side center piece. Only use Rubik’s cube formulas R, F, B, D (and their inverses) to move them to the top face. Be careful not to mess up the edge pieces already aligned with the side center pieces.
- The next step is the same as the above operation, but only three faces can be rotated. Take care not to disturb the edge pieces that have been aligned with the side center pieces.
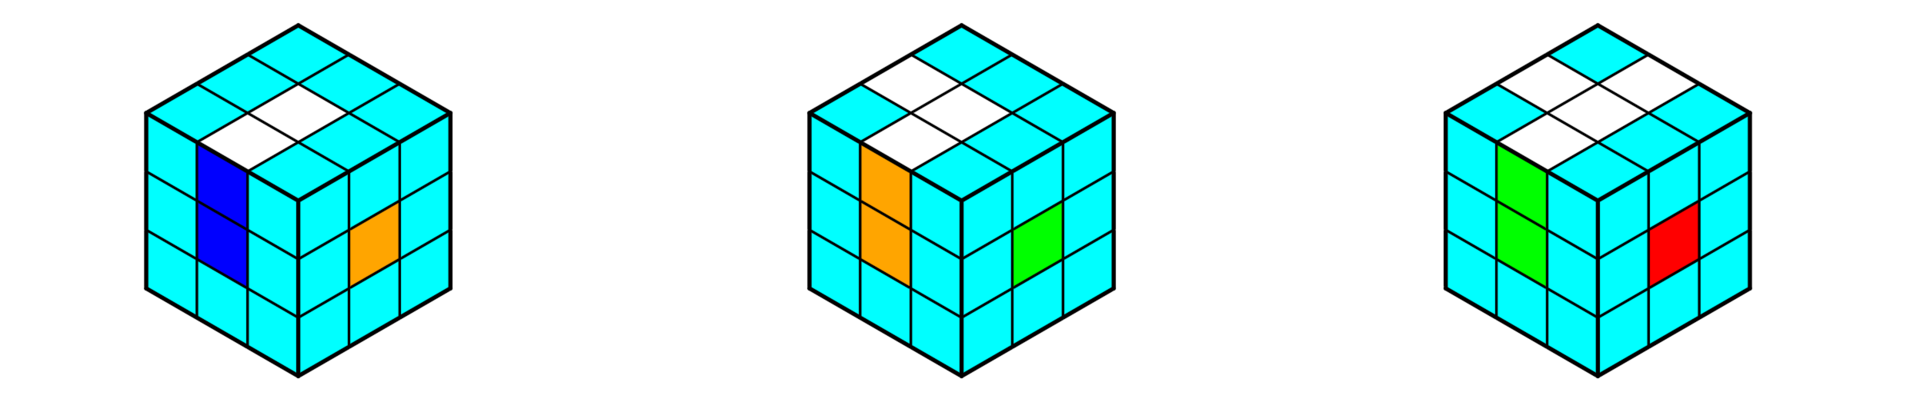
- The last step follows the same rule, yet only two faces can be rotated. Do not disrupt the pre-aligned edge pieces.
- If the following situation occurs, use Formula 1-1 to solve it.

- If the target edge piece stays in the middle of the solved face, apply Formula 1-2 to move the target edge piece down to the bottom layer before you continue to solve the cube.

- Method 2: Solve the bottom cross and align side edge colors in separate stages (yellow center as the top face)
- Ignore the other color of edge pieces, and flip all edge pieces containing white to the top face with the yellow center.
- Rotate the top layer to align the non-white color of each top edge piece with the corresponding side center color.
- After color alignment, directly rotate this side layer 180 degrees to flip the white edge piece down to the white bottom face.
- Repeat this step until all white edge pieces are flipped onto the white bottom face.

2.2 Solve the Four Bottom Corner Pieces ⚓︎
Formula 1-4: F D2 F' D' (Right side) / F' D2 F D (Left side)
- Case 1: There is a white-containing corner piece on the bottom layer of the side face
Rotate the bottom layer to turn the white side to the front face. Make the right (left) color of the corner piece match the center color of the right (left) face, and the bottom color of the corner piece match the center color of the front face. Use Formula 1-3 to solve it.

- Case 2: There is a white-containing corner piece on the top layer of the side face
Use Formula 1-3 to move the white corner piece on the top layer down to the bottom layer, then follow the steps of Case 1 to solve it. (Color alignment is unnecessary in Case 2, as it may disturb the already aligned side edge pieces.)

- Case 3: There is a white-containing corner piece on the bottom face
Rotate the bottom layer to align the other two colors of the white corner piece with the center colors of their adjacent faces respectively. Apply Formula 1-4 to convert this case to Case 1, then use Formula 1-3 to solve it. (The position of the white tile in Case 3 cannot distinguish left or right clearly; it only depends on the selected front face.)


3. Solve the Middle Layer ⚓︎
As shown in the figure below, solving the middle layer covers three scenarios: right shift, left shift and side edge flip. (There are many available formulas for solving the middle layer, and you can pick the ones that suit you for practice.)
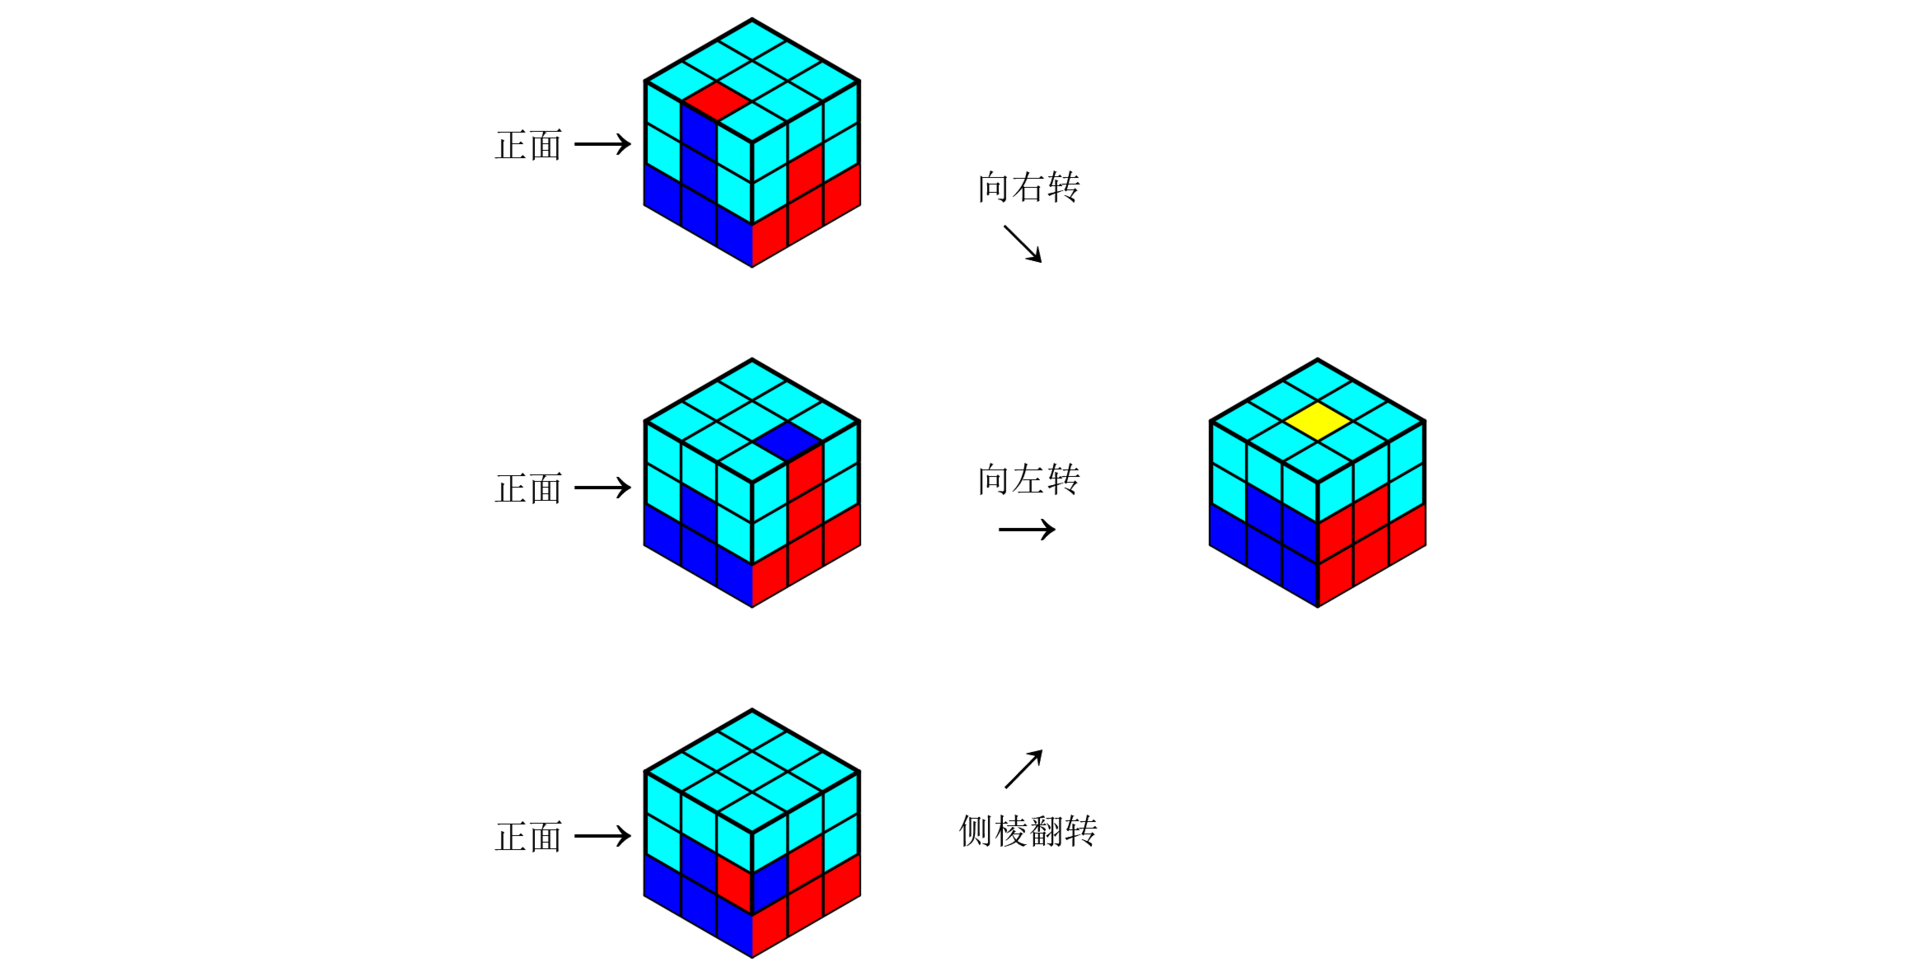
- Case 1 (Right shift): Use Formula 1-5, Formula 1-8 or Formula 1-10 to solve it.
- Case 2 (Left shift): Use Formula 1-6, Formula 1-9 or Formula 1-11 to solve it.
- Case 3 (Side edge flip): Use Formula 1-7 to solve it.
① General Formulas (Refer to the above figure for the front face rotation reference of these formulas)
Formula 1-6: R' F' R U R U' R' F
Formula 1-7: R U2 R' U R U2 R' U F' U' F
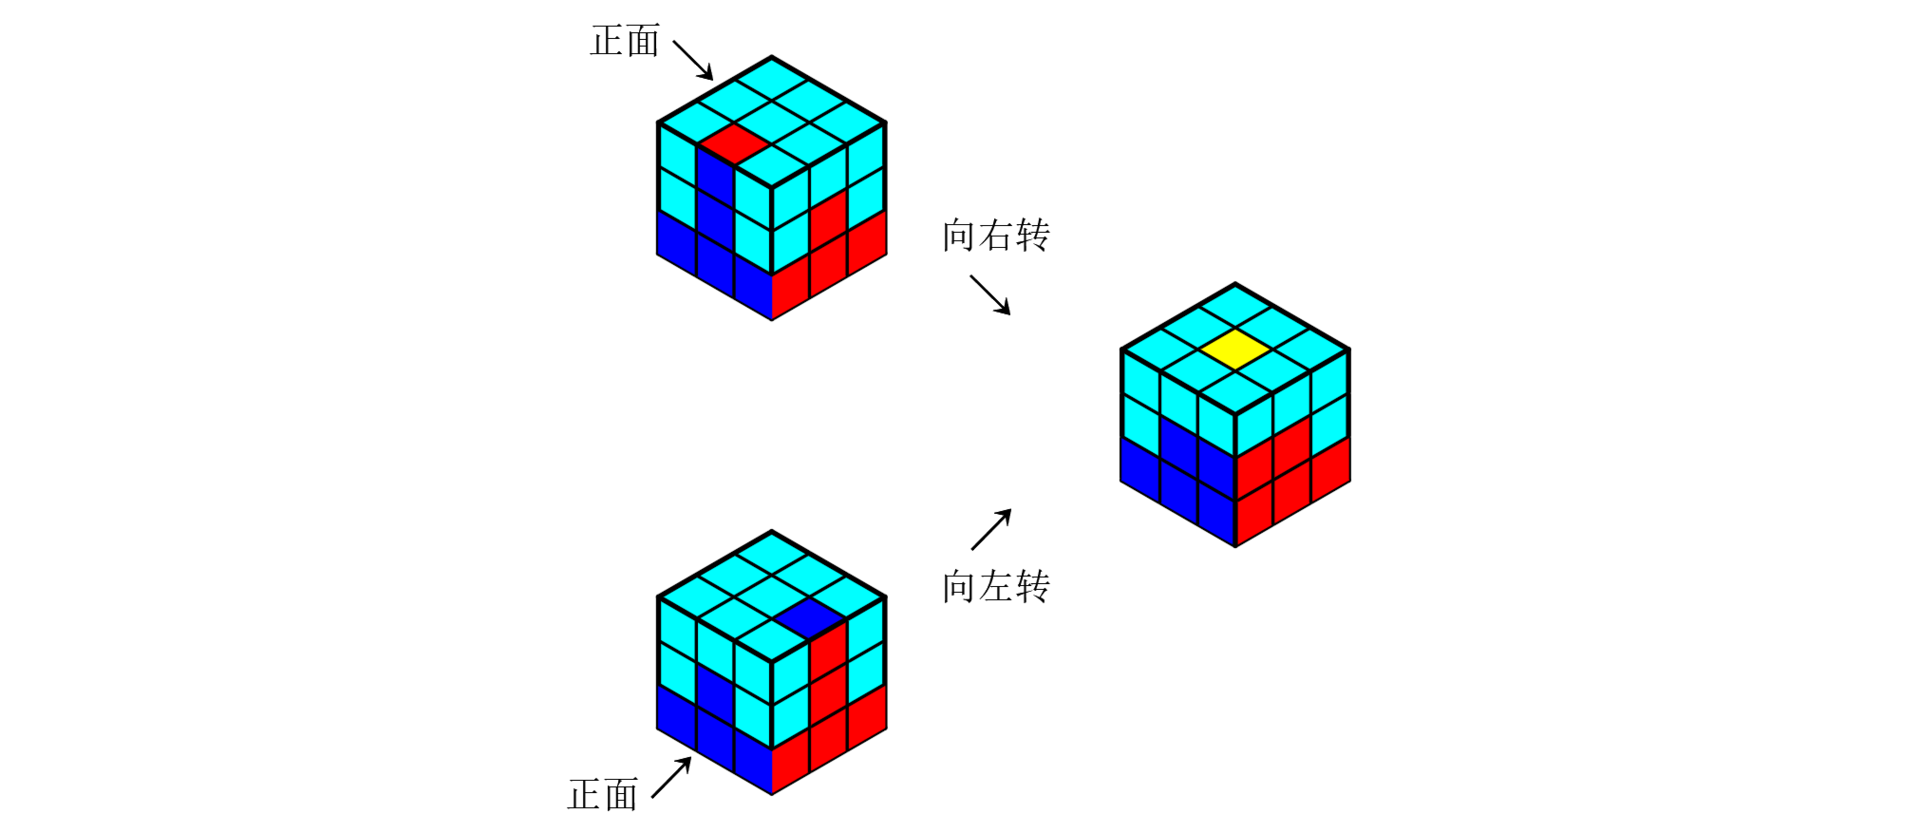
② Clockwise and Counterclockwise Formulas
Formula 1-9: R' U' R' U' R' U R U R (Five counterclockwise and four clockwise)
Refer to the figure below for the front face reference of these formulas:
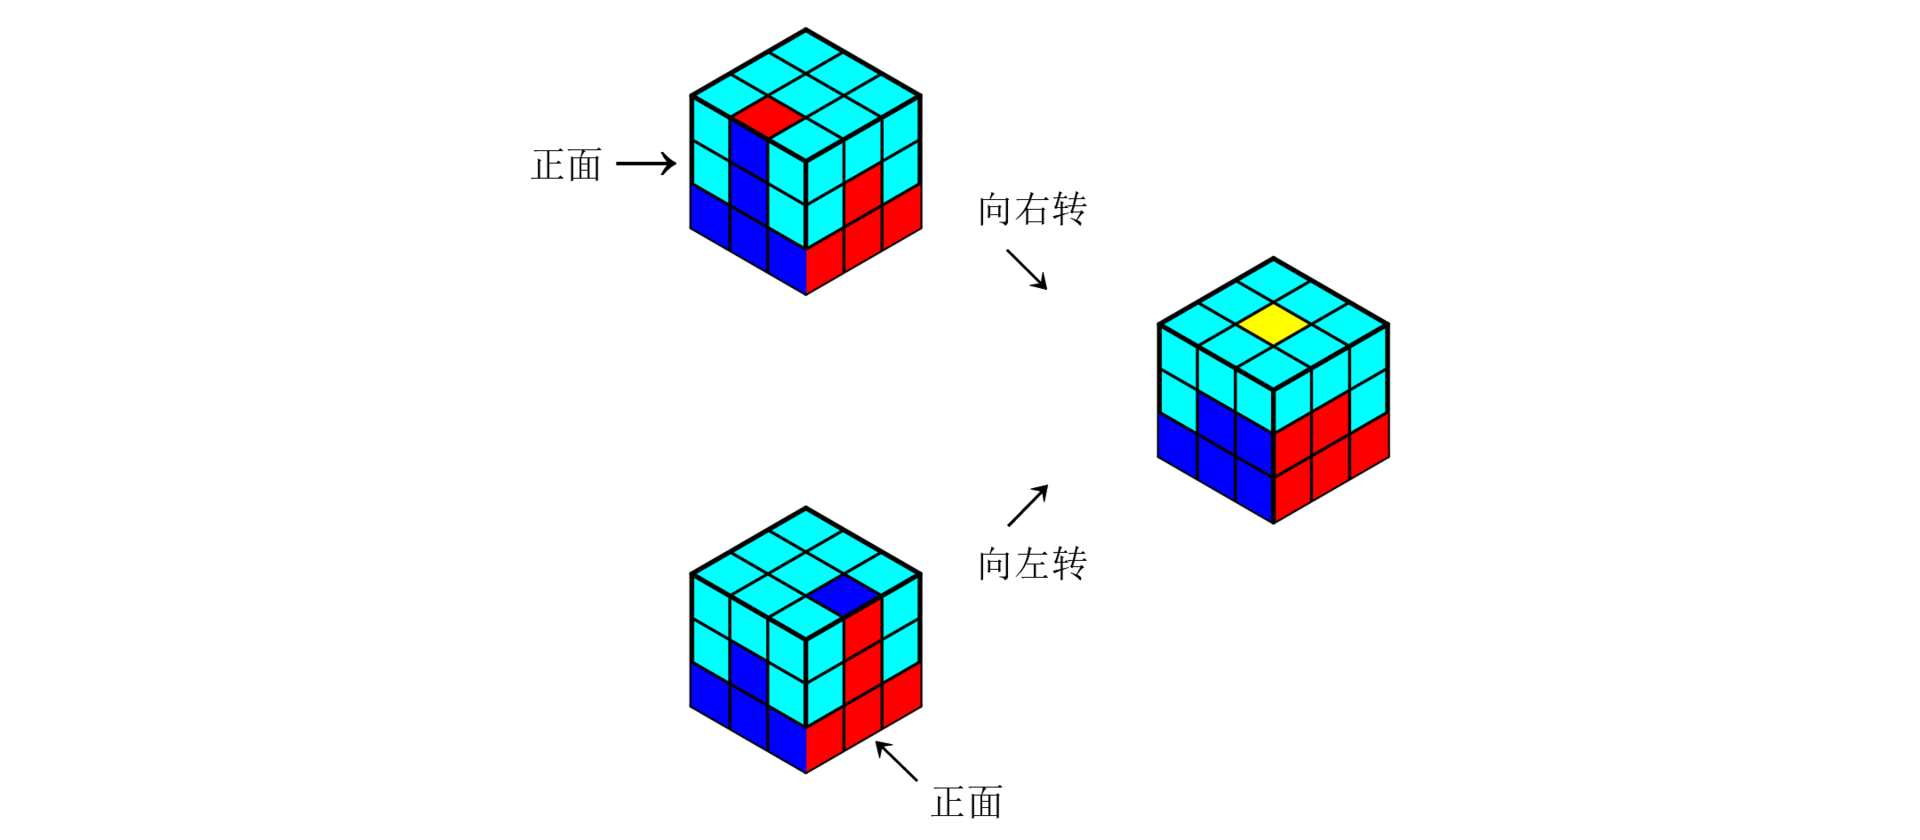
③ Symmetric Formulas
Formula 1-11: U' L' U L U F U' F'
Refer to the figure below for the front face reference of these formulas:
4. Solve the Top Layer ⚓︎
4.1 Solve the Top Cross ⚓︎
Solving the top cross covers four stages: dot stage, corner bend stage, horizontal line stage and cross stage (the final stage).
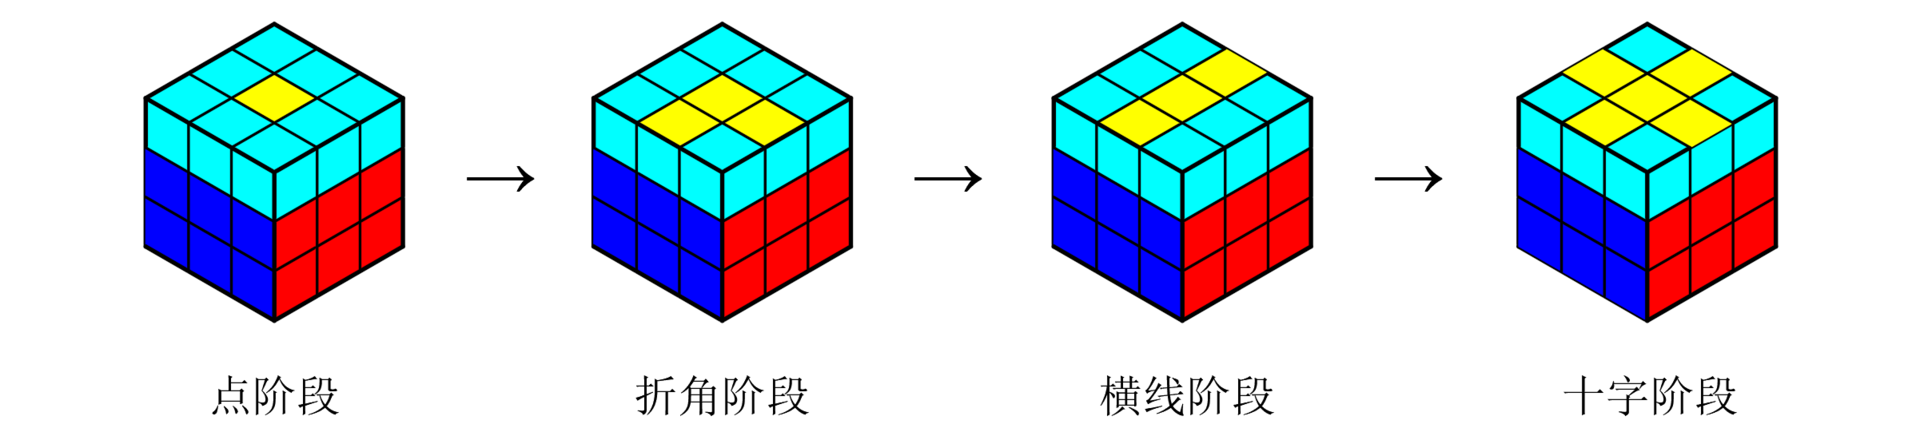
Formula 1-12 can convert one stage to another. However, if the position of the top face is not adjusted, you may get stuck in a loop and fail to reach the final cross stage.
The figure below shows 8 possible states of the top cross:

The following illustrates the resulting top state after applying Formula 1-12 once to a certain top cross state. Follow the rules below and your own top face state, and use Formula 1-12 together with U / U’ to solve the top face into the cross stage.
Ⅱ
Ⅲ
Ⅳ
Ⅴ
Ⅵ
Ⅶ
Ⅷ
→
→
→
→
→
→
→
Ⅵ
Ⅲ
Ⅶ
Ⅴ
Ⅰ
Ⅷ
Ⅳ
4.2 Solve the Top Face ⚓︎
Formula 1-14: R U2 R' U' R U' R'
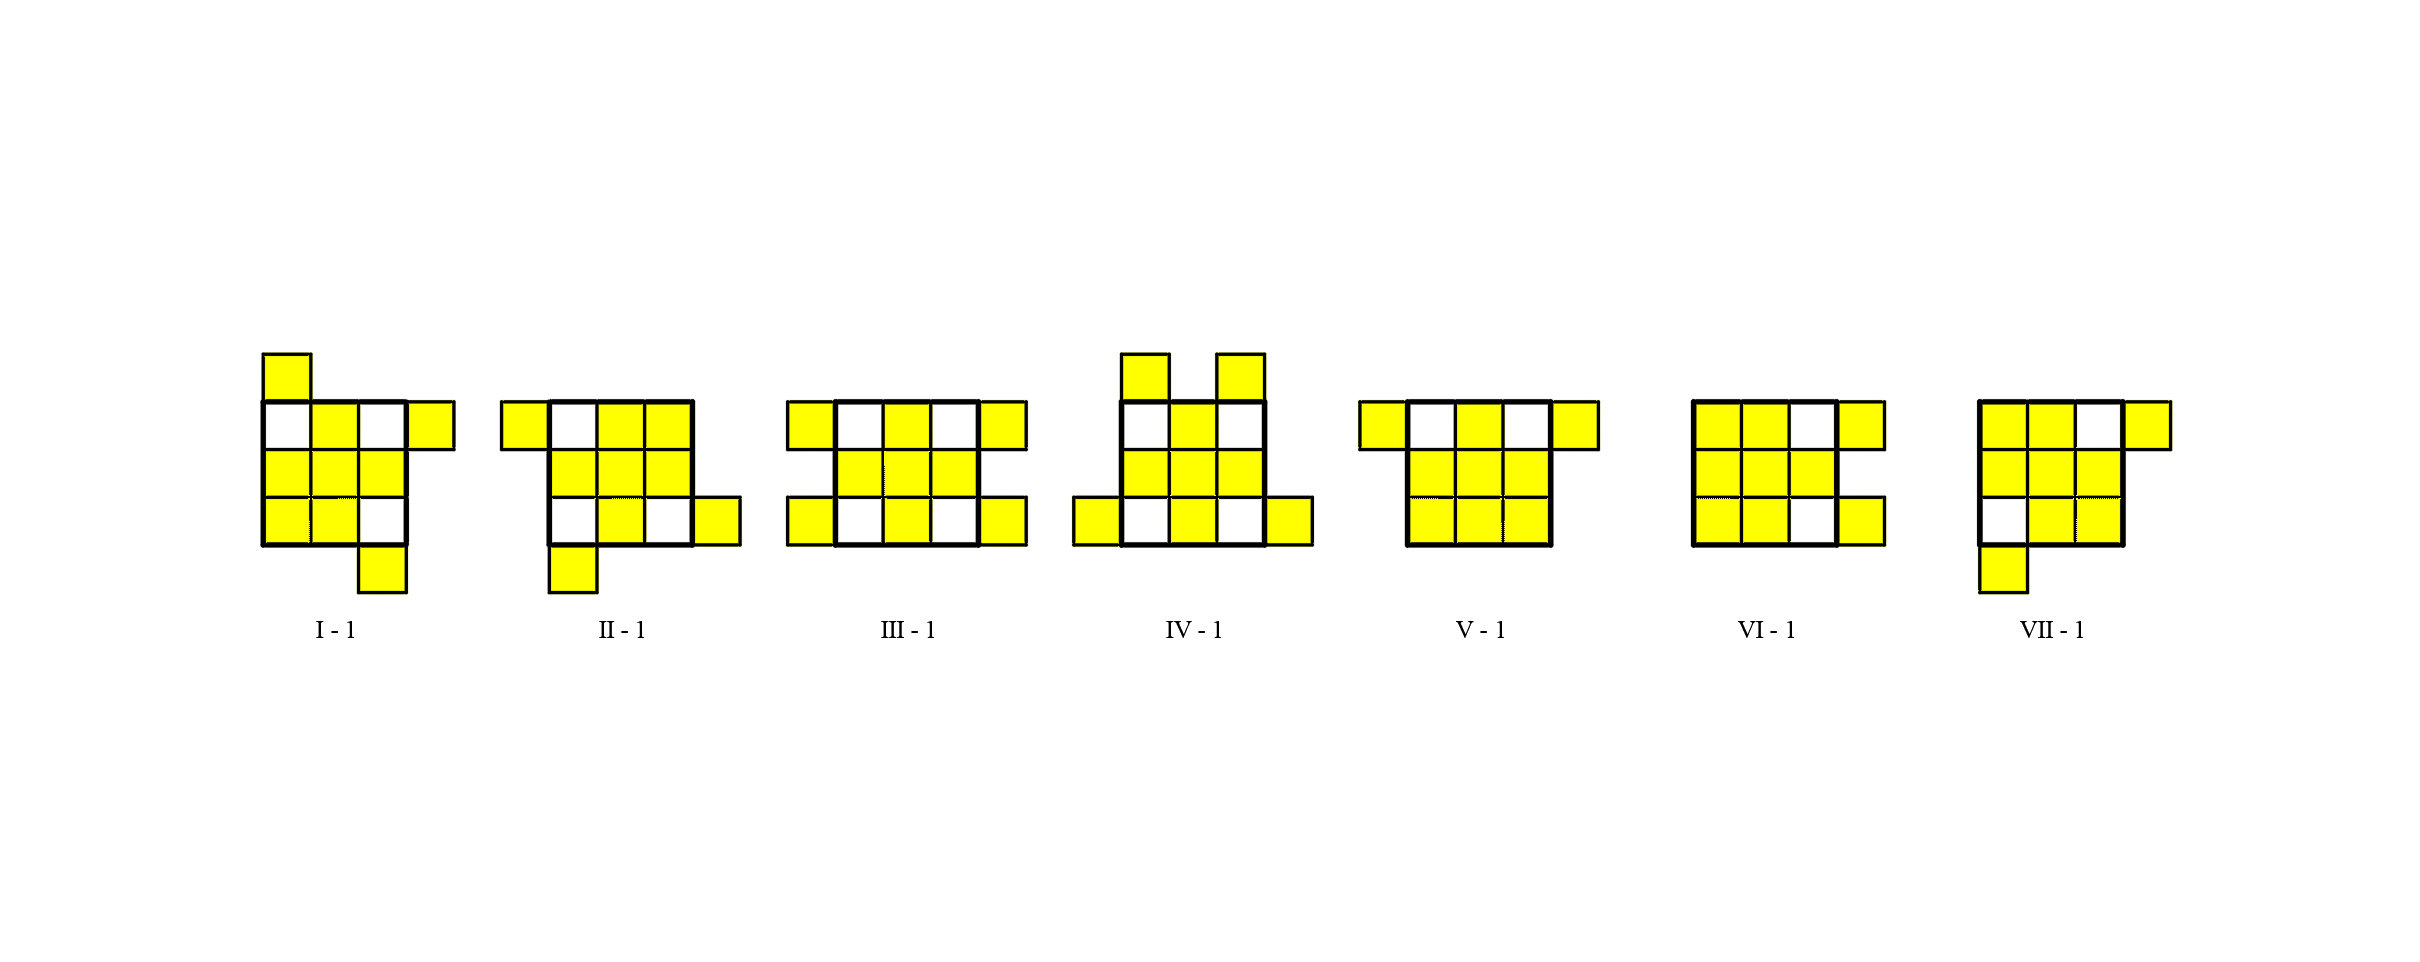
The figure below shows 7 possible top-face states after finishing solving the top cross.
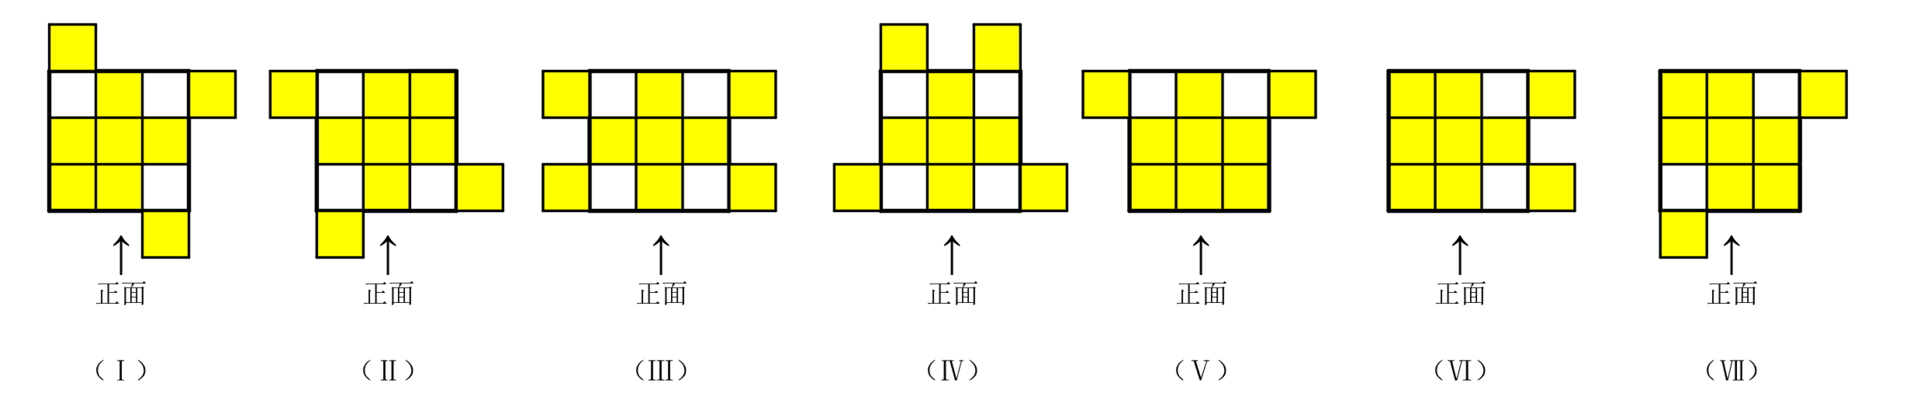
Listed below are the corresponding formulas for solving each of the seven states:
Ⅱ
Ⅲ
Ⅳ
Ⅴ
Ⅵ
Ⅶ
:
:
:
:
:
:
Formula 1-14
Formula 1-13 + Formula 1-13
Formula 1-13 + U + Formula 1-13
Formula 1-14 + U + Formula 1-13
Formula 1-14 + U' + Formula 1-13
Formula 1-13 + U2 + Formula 1-14
For solving more states of the top face, please refer to: All States, Transformations and Solving Steps for the Top Face of a 3×3 Rubik’s Cube
4.3 Solve the Four Top Corner Pieces ⚓︎
- First check if there are corner pieces with identical colors on the side faces of the top layer. If such corners exist, set the face with matching colored corners as the front face, then use Formula 1-15 to align the colors of the left and right top corner pieces on all four side faces.

- If no side face of the top layer has matching colored corners, pick any face as the front face and apply Formula 1-15. After this operation, one side face will get matching colored corners. Set that face as the new front face and run Formula 1-15 again to finish this step.

- Finally rotate the entire top layer to match the colors of the top left and right corner pieces with the side colors of the two lower layers.
4.4 Solve the Top Layer Edge Pieces ⚓︎
Each time Formula 1-16 is applied, the cube transforms as shown in the figure below:

- First, check if there is a side face of the top layer whose middle edge shares the same color as its left and right corner pieces. If such a face exists, set the opposite face of this side as the front face and use Formula 1-16 to solve it. If it is not solved after one run, apply Formula 1-16 a second time to complete the alignment.
- If no side face has a middle edge matching the colors of its two adjacent corners, pick any face as the front face and run Formula 1-16. Afterwards, one side face will have fully aligned side colors. Set the opposite side of this aligned face as the new front face, then use Formula 1-16 to finish solving.

 Wechat
 Alipay

Wechat Official Account has more content!