目录
- I. Preparations
- II. Deploy to Cloud Server
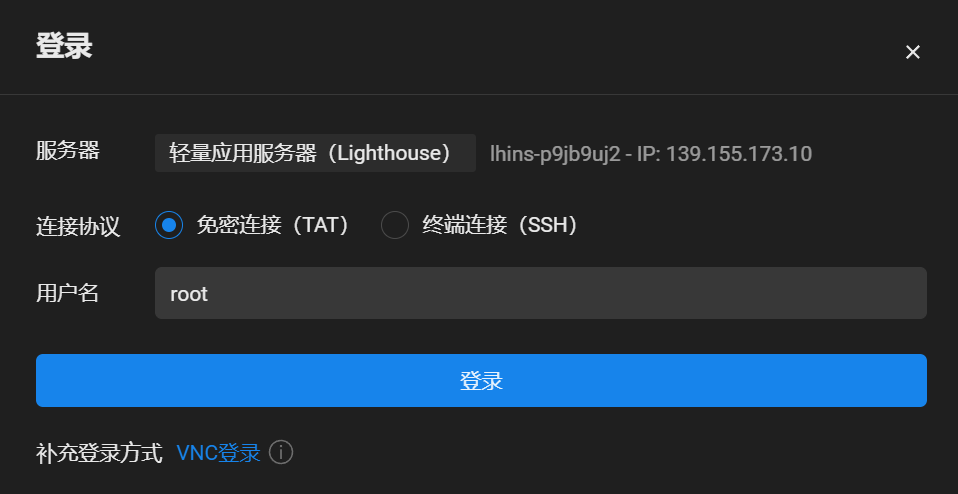
- 1. Log in to Cloud Server (run in local terminal) (optional)
- 2. Update System Packages
- 3. Install Git
- 4. Install Nginx (to serve Hexo static files)
- Install Both at Once (optional)
- 5. Start Nginx
- 6. Create Website Root Directory (for Hexo static files)
- 7. Configure Nginx
- 8. Create Git Bare Repository Directory
- 9. Create Git Hook
- 10. Modify Hexo Config and Deploy
- III. Common Issues
- IV. Create a Git User (Avoid Deploying as root) (optional)
- V. SSH Passwordless Login
- Check Permissions
I. Preparations ⚓︎
- Completed local Hexo project files, see: Hexo Tutorial (Part 1), Hexo Tutorial (Part 2), Hexo Tutorial (Part 3), etc.
- A purchased cloud server, such as Tencent Cloud, Alibaba Cloud, etc.
- Server OS: CentOS or Ubuntu, etc.
- Open server ports: 22 (SSH), 80 (HTTP), 443 (HTTPS, optional).
- Server public IP and root password / SSH key obtained.
- Domain purchased and filed (ICP filing required for access in China) (optional).
- SSL certificate purchased (enables HTTPS access) (optional).
II. Deploy to Cloud Server ⚓︎
1. Log in to Cloud Server (run in local terminal) (optional) ⚓︎
1 | ssh root@server_ip |
After running, you will be prompted for the server root password; enter it to log in.
2. Update System Packages ⚓︎
1 | # CentOS |
3. Install Git ⚓︎
1 | # CentOS |
4. Install Nginx (to serve Hexo static files) ⚓︎
1 | # CentOS |
Install Both at Once (optional) ⚓︎
1 | # CentOS |
5. Start Nginx ⚓︎
1 | # Start Nginx |
6. Create Website Root Directory (for Hexo static files) ⚓︎
1 | sudo mkdir -p /blog/hexo |
- Modify permissions: [1]
1 | sudo chown -R $USER:$USER /blog/hexo |
7. Configure Nginx ⚓︎
- Create the Nginx configuration file:
1 | sudo vim /etc/nginx/conf.d/hexo.conf |
In the opened vim editor, enter the following configuration (press i to enter insert mode):
1 | server { |
When finished editing, press Esc, then type :wq to save and exit vim.
1 | # Verify configuration |
- Ubuntu / Debian systems (optional)
Create the Nginx configuration file and enter the config (same as above):
1 | sudo vim /etc/nginx/sites-available/hexo |
Then enable the configuration:
1 | # Create symlink (enable the site) |
8. Create Git Bare Repository Directory ⚓︎
1 | sudo mkdir -p /blog/hexo.git |
- Modify permissions: [2]
1 | sudo chown -R $USER:$USER /blog/hexo.git |
Initialize the bare repository:
1 | cd /blog/hexo.git |
9. Create Git Hook ⚓︎
1 | sudo vim /blog/hexo.git/hooks/post-receive |
Enter the following:
1 | #!/bin/bash |
- Grant execute permission: [3]
1 | sudo chown -R $USER:$USER /blog/hexo.git/hooks/post-receive |
10. Modify Hexo Config and Deploy ⚓︎
repo format: {admin_username}@{server_ip}:{git_bare_repo_path}
1 | deploy: |
Finally, run:
1 | hexo clean && hexo g && hexo s |
You will be prompted for the server root password; enter it to complete deployment.
III. Common Issues ⚓︎
1. 404 Not Found ⚓︎
Nginx misconfiguration: the root directive points to the wrong directory, location rules are improperly set, or DNS resolution is incorrect.
2. 403 Forbidden ⚓︎
After configuring Nginx, if you see 403 Forbidden when visiting the site, the Nginx configuration itself is likely fine.
If 403 Forbidden appears after deployment, possible causes include:
(1) Insufficient File/Directory Permissions ⚓︎
Make sure all permission-related commands (chown and chmod) from the steps above have been executed.
(2) SELinux / AppArmor Restrictions ⚓︎
Solutions:
(1) Identify the active security module
1 | # Check SELinux |
- If
sestatusshowsSELinux status: enabled, it’sSELinux. - If the
apparmorservice isactive, it’sAppArmor.
(2) Disable SELinux
1 | # Temporarily disable SELinux (for testing) |
- A server reboot is required for the change to take effect.
(3) Disable AppArmor
1 | # Temporarily disable AppArmor |
(3) Git Hook Sync Issues ⚓︎
Check whether Hexo static files exist in the website root directory. If they do, the issue is with Nginx configuration; if not, first check the hook file.
1 | # Navigate to hooks directory |
If it says directory does not exist or permission denied, follow the steps above to create the directory and fix permissions;
if files sync successfully, the hook itself is fine and the issue may be due to environment variable differences. Modify the hook as follows:
1 | #!/bin/bash |
(4) File Owner/Group ⚓︎
Some cloud servers have a default username other than root. For example, Ubuntu on Tencent Cloud uses ubuntu as the default user; when you log in as root, the Linux prompt shows root@VM-0-9-ubuntu, which can be confusing. Here’s the simplest way to resolve all file ownership issues. (@ is the separator: username before @, hostname after.)
- First, confirm your cloud server’s username — usually found in the cloud server console;
- Then, in the Hexo config, change the admin username in
"{admin_username}@{server_ip}:{git_bare_repo_path}"to your actual cloud server username; - Finally, change the owner/group of the
hexo,hexo.git, andpost-receivefiles to your cloud server username.
For example, if my cloud server username is ubuntu, the config would be repo: ubuntu@IP:/blog/hexo.git, and I would run sudo chown -R ubuntu:ubuntu {file_path} to update the owner/group of hexo, hexo.git, and post-receive.

Note: $USER refers to the currently logged-in user. If I’m logged in as root, the commands above would set owner/group to root instead of ubuntu, which could cause issues.
IV. Create a Git User (Avoid Deploying as root) (optional) ⚓︎
- All steps remain the same except the ones below.
1. Create Git User ⚓︎
1 | # Create git user and auto-generate /home/git home directory |
After running passwd git, enter the password twice.
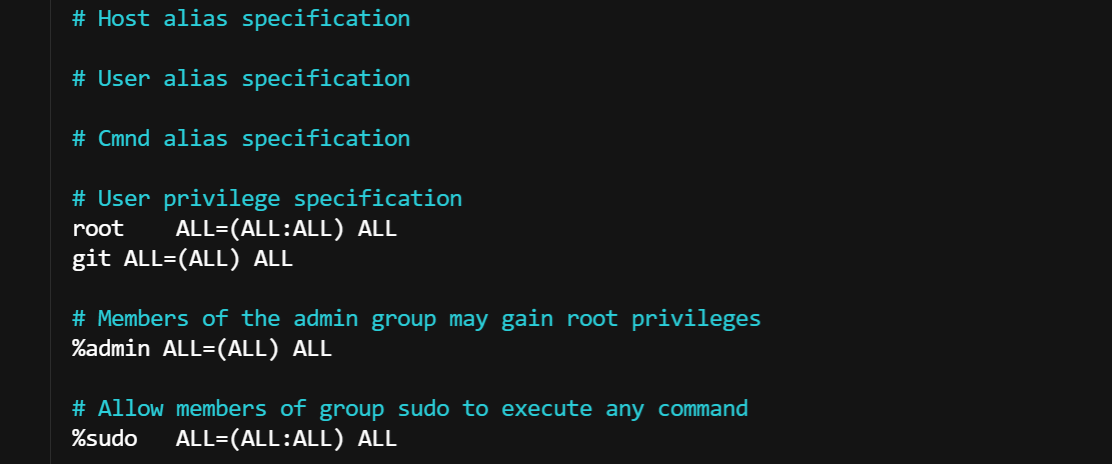
2. Grant Sudo Privileges to Git User ⚓︎
1 | # Edit sudoers file |
3. Log in via SSH (locally) ⚓︎
1 | ssh git@server_ip |
4. Modify Permissions ⚓︎
Use sudo chown -R git:git {file_path} to change the owner/group of hexo, hexo.git, and post-receive.
5. Update Hexo Configuration ⚓︎
1 | repo: git@IP:/blog/hexo.git |
V. SSH Passwordless Login ⚓︎
- Private key (id_rsa): stored on the client (local machine)
- Public key (id_rsa.pub): uploaded to the server
- During login, the server verifies the client’s private key against the public key; on a successful match, login is passwordless.
Choose one of the three methods below. The third is recommended — simplest, but requires a Tencent Cloud server.
1. Local → Server ⚓︎
(1) Generate SSH key pair locally
1 | # Generate SSH key pair (-t specifies encryption type rsa, -C adds comment, usually an email) |
You will be prompted:
Enter file in which to save the key (C:\Users\username/.ssh/id_rsa): press Enter (use default path)
Enter passphrase (empty for no passphrase): press Enter (no passphrase for passwordless login)
Enter same passphrase again: press Enter again
This generates id_rsa (private key) and id_rsa.pub (public key) in the ~/.ssh/ directory.
(2) Upload the public key to the server
A: Upload via command (use Git Bash, or install OpenSSH)
1 | ssh-copy-id root@server_ip |
B: Upload manually
1 | # View and copy the public key locally (on your machine) |
2. Server → Local ⚓︎
(1) Generate SSH key pair on the server
1 | ssh-keygen -t rsa -C "server_key" |
(2) Download the server private key to local
A: Download via command
1 | scp -P 22 root@192.168.1.100:~/.ssh/id_rsa ~/.ssh/server_id_rsa |
B: Download manually
1 | # View and copy the private key on the server (on the server) |
3. Tencent Cloud SSH Key ⚓︎
Log in to the Tencent Cloud Console → go to Cloud Virtual Machine or LightHouse → find SSH Keys in the left sidebar.
(1) Create a new key → local
Create Key → Select Region → Name the key → Create a new key pair → OK. The browser will automatically download the private key file (.pem format). Be sure to save it — this is your only download opportunity. Move the downloaded .pem file to C:\Users\username\.ssh\ and rename it to id_rsa.
(2) Local → Use existing public key (optional)
1 | # Run locally |
Create Key → Select Region → Name the key → Use an existing public key → Paste your local public key → OK.
(3) Bind the SSH key
On the SSH Keys page in the Tencent Cloud console, click Bind Instances and select your cloud server; or on the Cloud Virtual Machine page, click SSH Key, then Bind Key, and select the key you just created.
Check Permissions ⚓︎
 Wechat
 Alipay




Wechat Official Account has more content!