目录
I. Preparations ⚓︎
1. Install Git ⚓︎
Official download: https://git-scm.com.
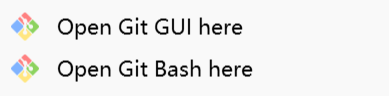
After installation, right-click on your desktop and you will see Open Git GUI here and Open Git Bash here; we will use Git Bash.
Chinese localization for Git Bash: Open Git Bash, right-click and select Options, choose Window on the left sidebar, select zh_CN under UI language, then click Save.
Chinese localization for Git GUI: Download the localization package from https://github.com/stayor/git-gui-zh, or click here to download.
Type git --version in the terminal. If the version number is displayed, Git is installed successfully.
1 | git --version |

Configure Git username and email:
(1) Global configuration (sets username and email for all projects)
1 | git config --global user.name "your username" |
(2) Per-project configuration (sets username and email for the current project)
1 | cd /path/to/your/project |
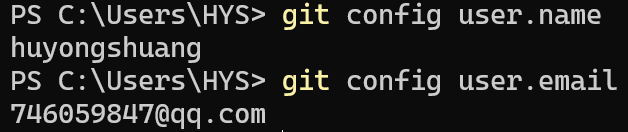
(3) Verify the configuration
1 | git config user.name |
2. Install Node.js ⚓︎
Official download: https://nodejs.org/zh-cn/download.
Type node -v in the terminal. If the version number is displayed, Node.js is installed successfully.
1 | node -v |

npm is installed along with Node.js. Type npm -v to check its version.
1 | npm -v |

3. Register a GitHub Account ⚓︎
Official website: https://github.com.
Click the Sign up button, fill in your username, password and email address, then click Create account.
II. Create a Repository ⚓︎
Create a repository on GitHub to host our website files.
On the GitHub homepage, click the + icon in the top-right corner, then select New repository to go to the repository creation page.
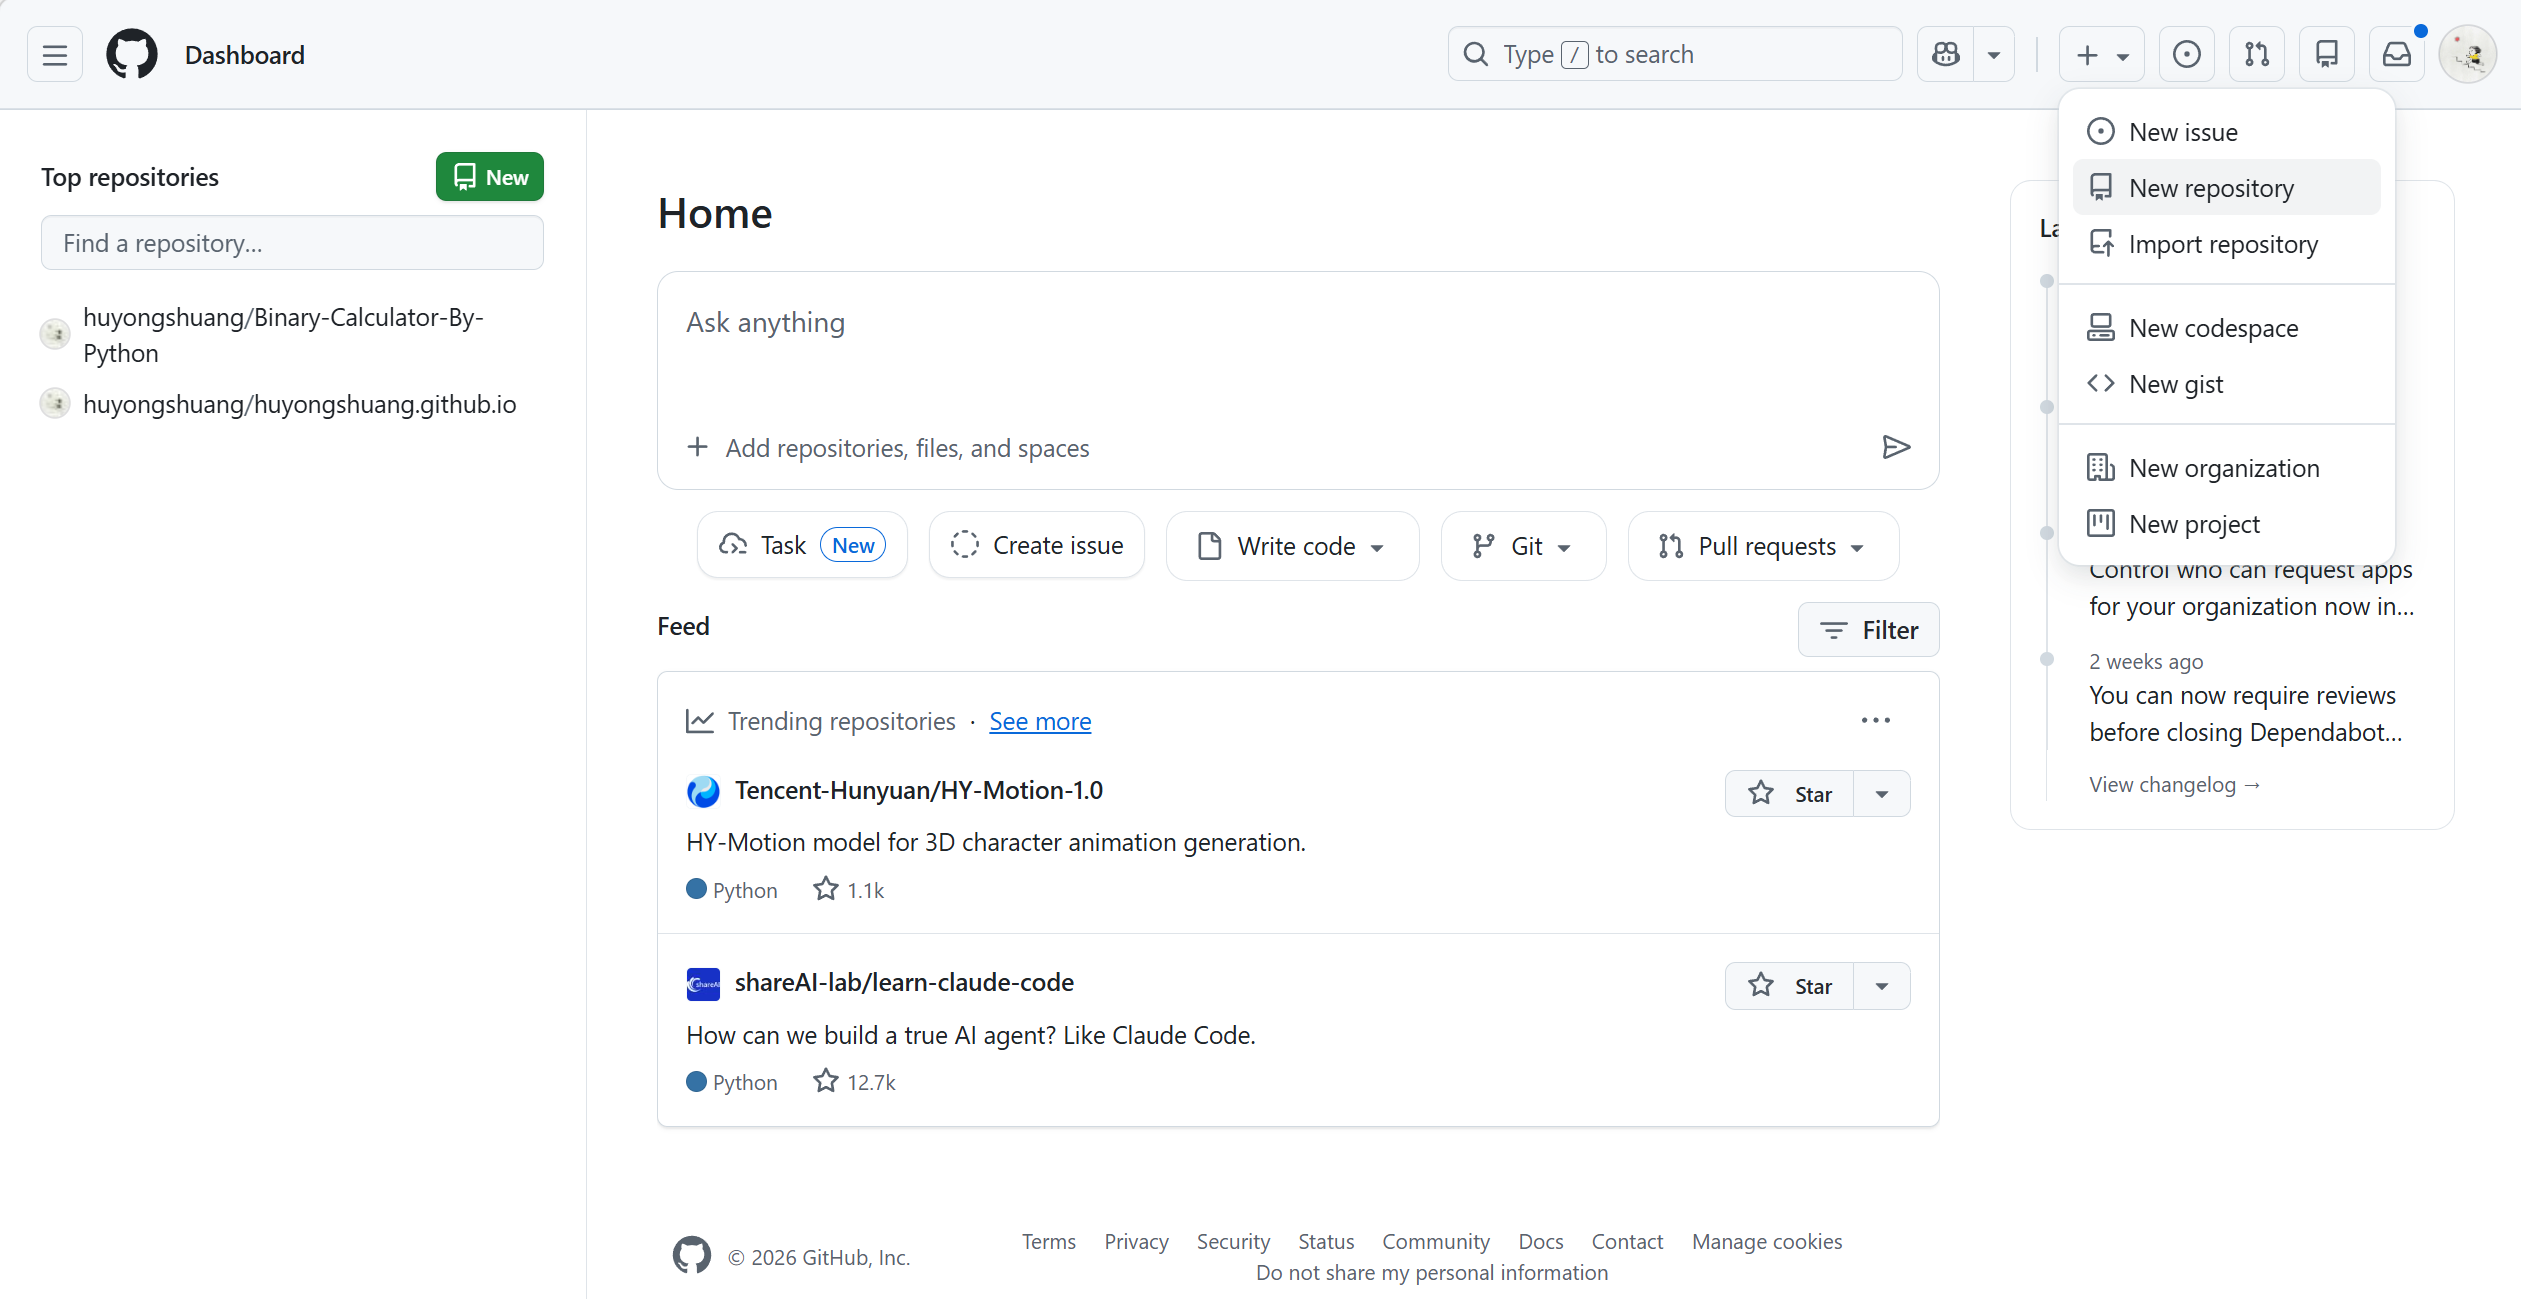
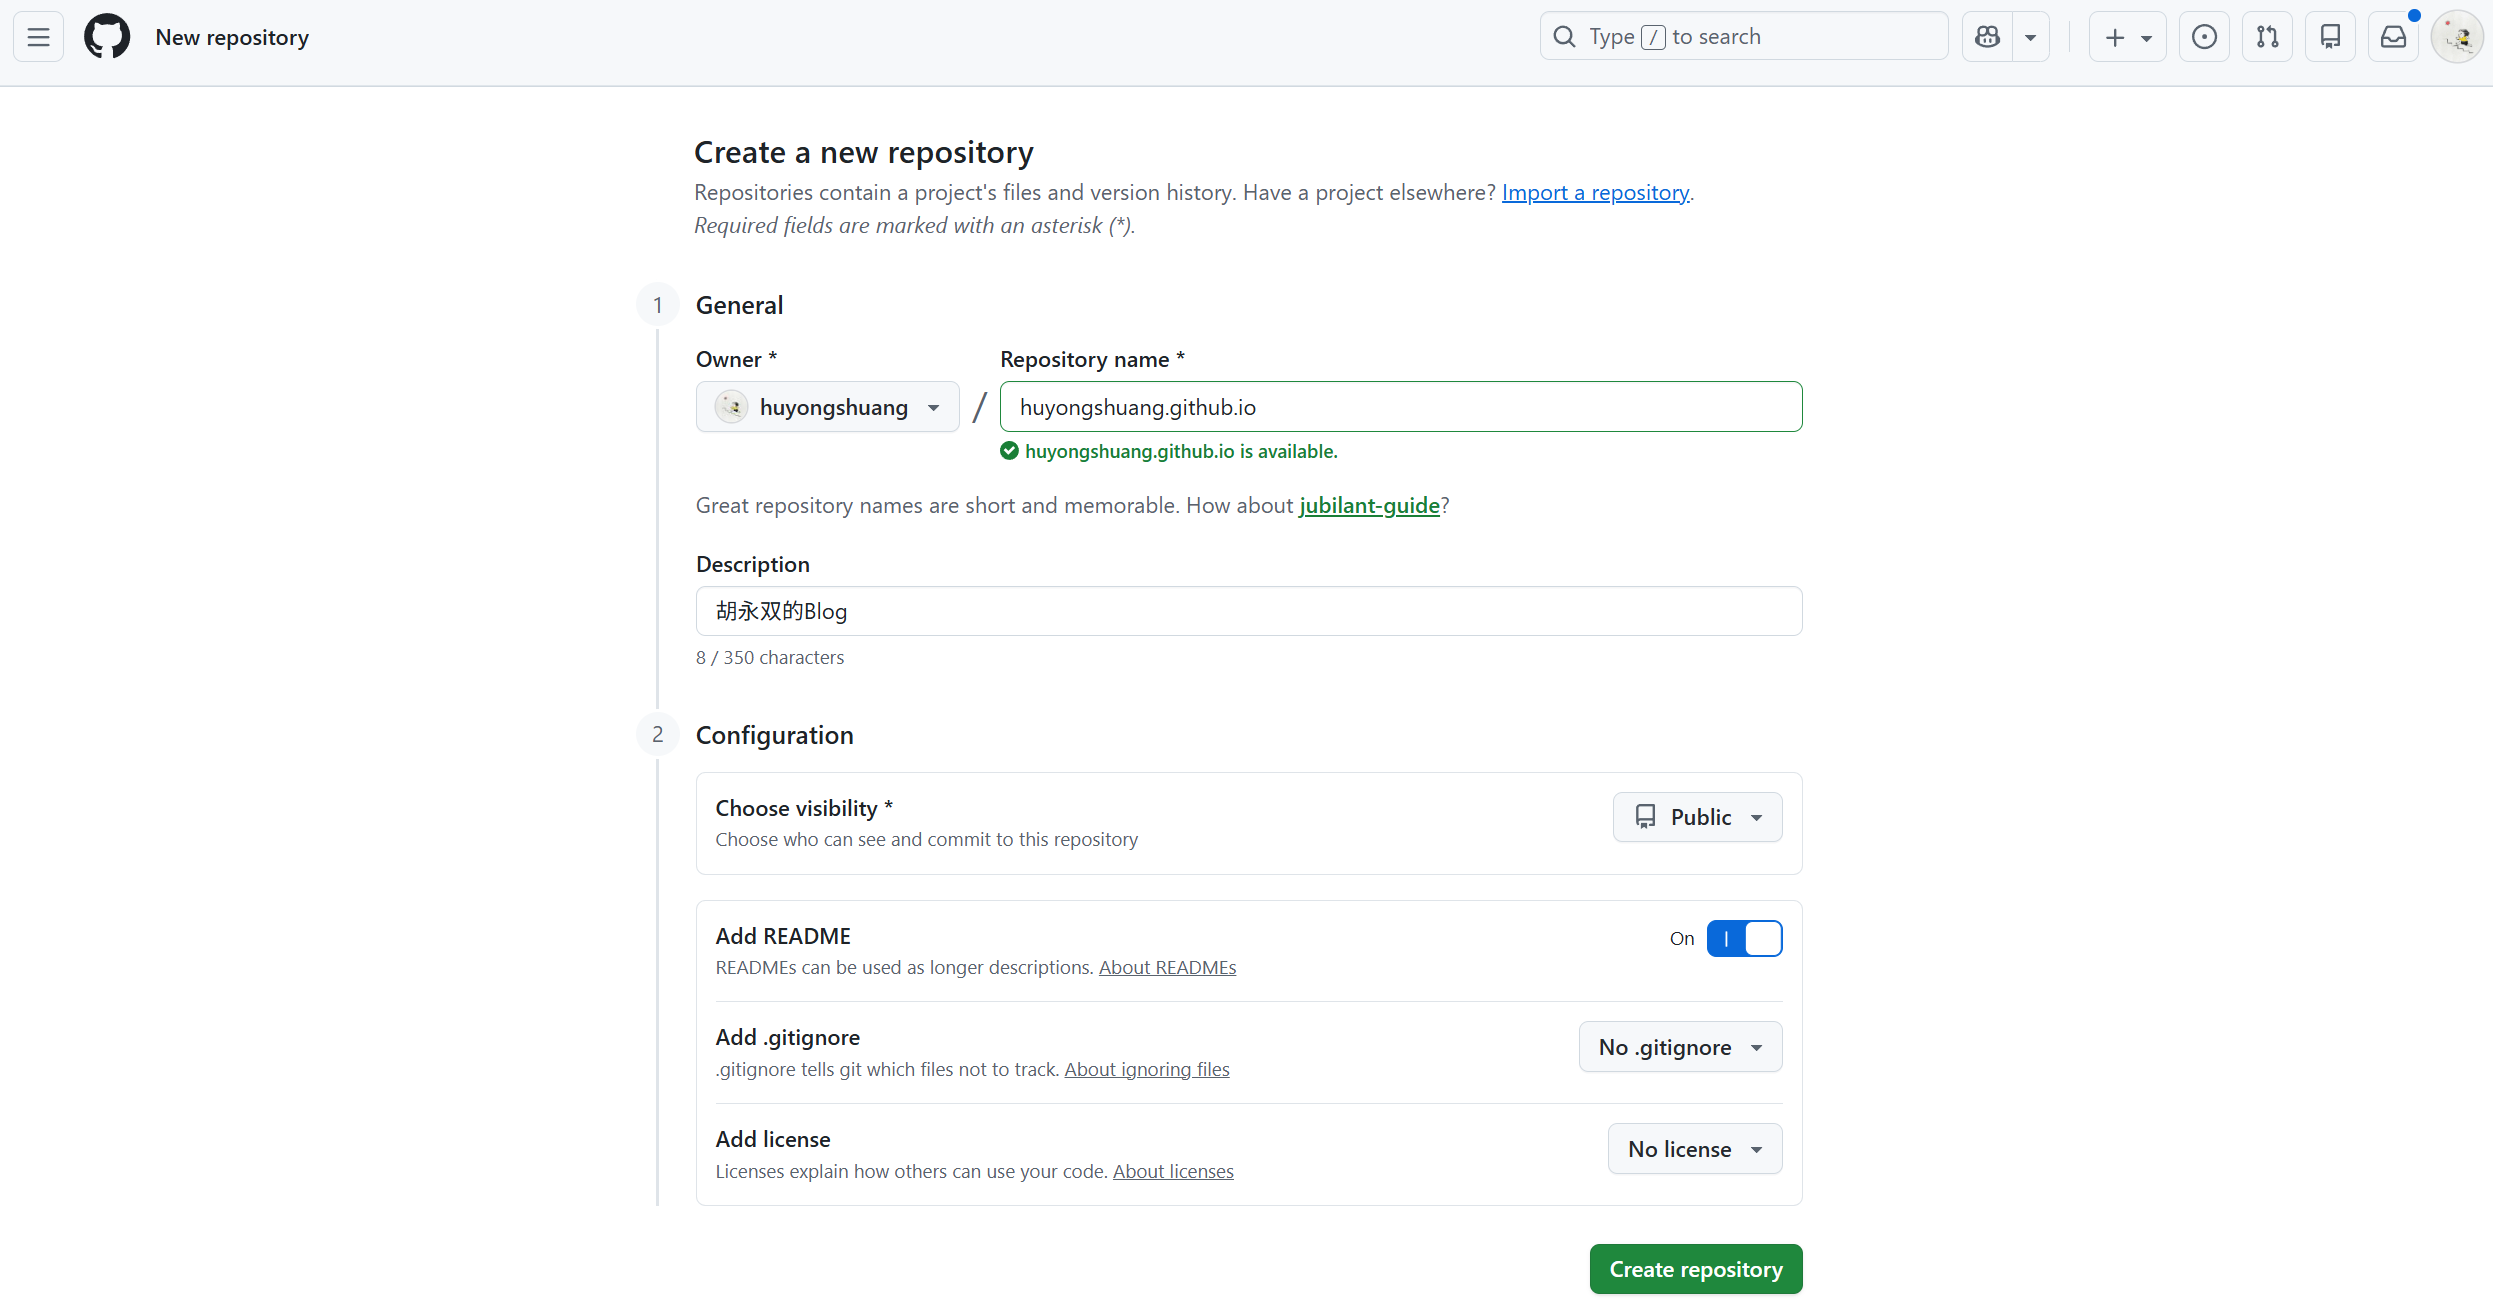
Enter the repository name in the Repository name field, which must follow the format <username>.github.io. You will then be able to access your site via https://<username>.github.io. You can fill in a repository description in the Description field, then click Create repository.
III. Install Hexo ⚓︎
Hexo is a fast, simple and powerful blog framework. It parses articles written in Markdown (or other markup languages) and generates static web pages with beautiful themes in seconds.
1. Install Hexo ⚓︎
Once all required applications are installed, you can install Hexo via npm.
1 | npm install -g hexo-cli |
Check Hexo version
1 | hexo version |
2. Initialize a New Site ⚓︎
After installing Hexo, run the following commands. Hexo will create all required files in the specified folder. (<folder> is your project folder name, customizable; if omitted, the site will be created in the current directory.)
1 | hexo init <folder> |
After initialization, your project folder structure will look like this:
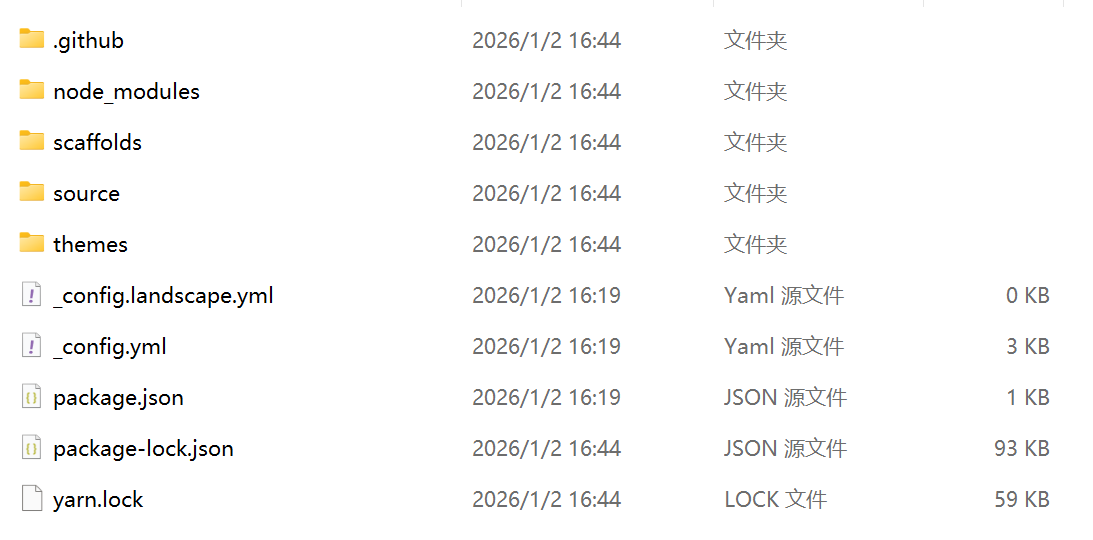
scaffolds: Template folder. When you create a new post, Hexo generates the file based on the corresponding scaffold.source: Asset folder for user content. Except for the_postsfolder, files/folders starting with_(underscore) and hidden files will be ignored. Markdown and HTML files will be parsed and placed in thepublicfolder, while other files will be copied as-is.themes: Theme folder. Hexo generates static pages based on the active theme (themes installed vianpmare stored in thenode_modulesfolder)._config.yml: Site configuration file. You can configure most site parameters here.package.json: Application metadata.
3. Generate Static Files and Local Preview ⚓︎
1 | hexo generate # Generate static files |
All generated static files are stored in the public folder.
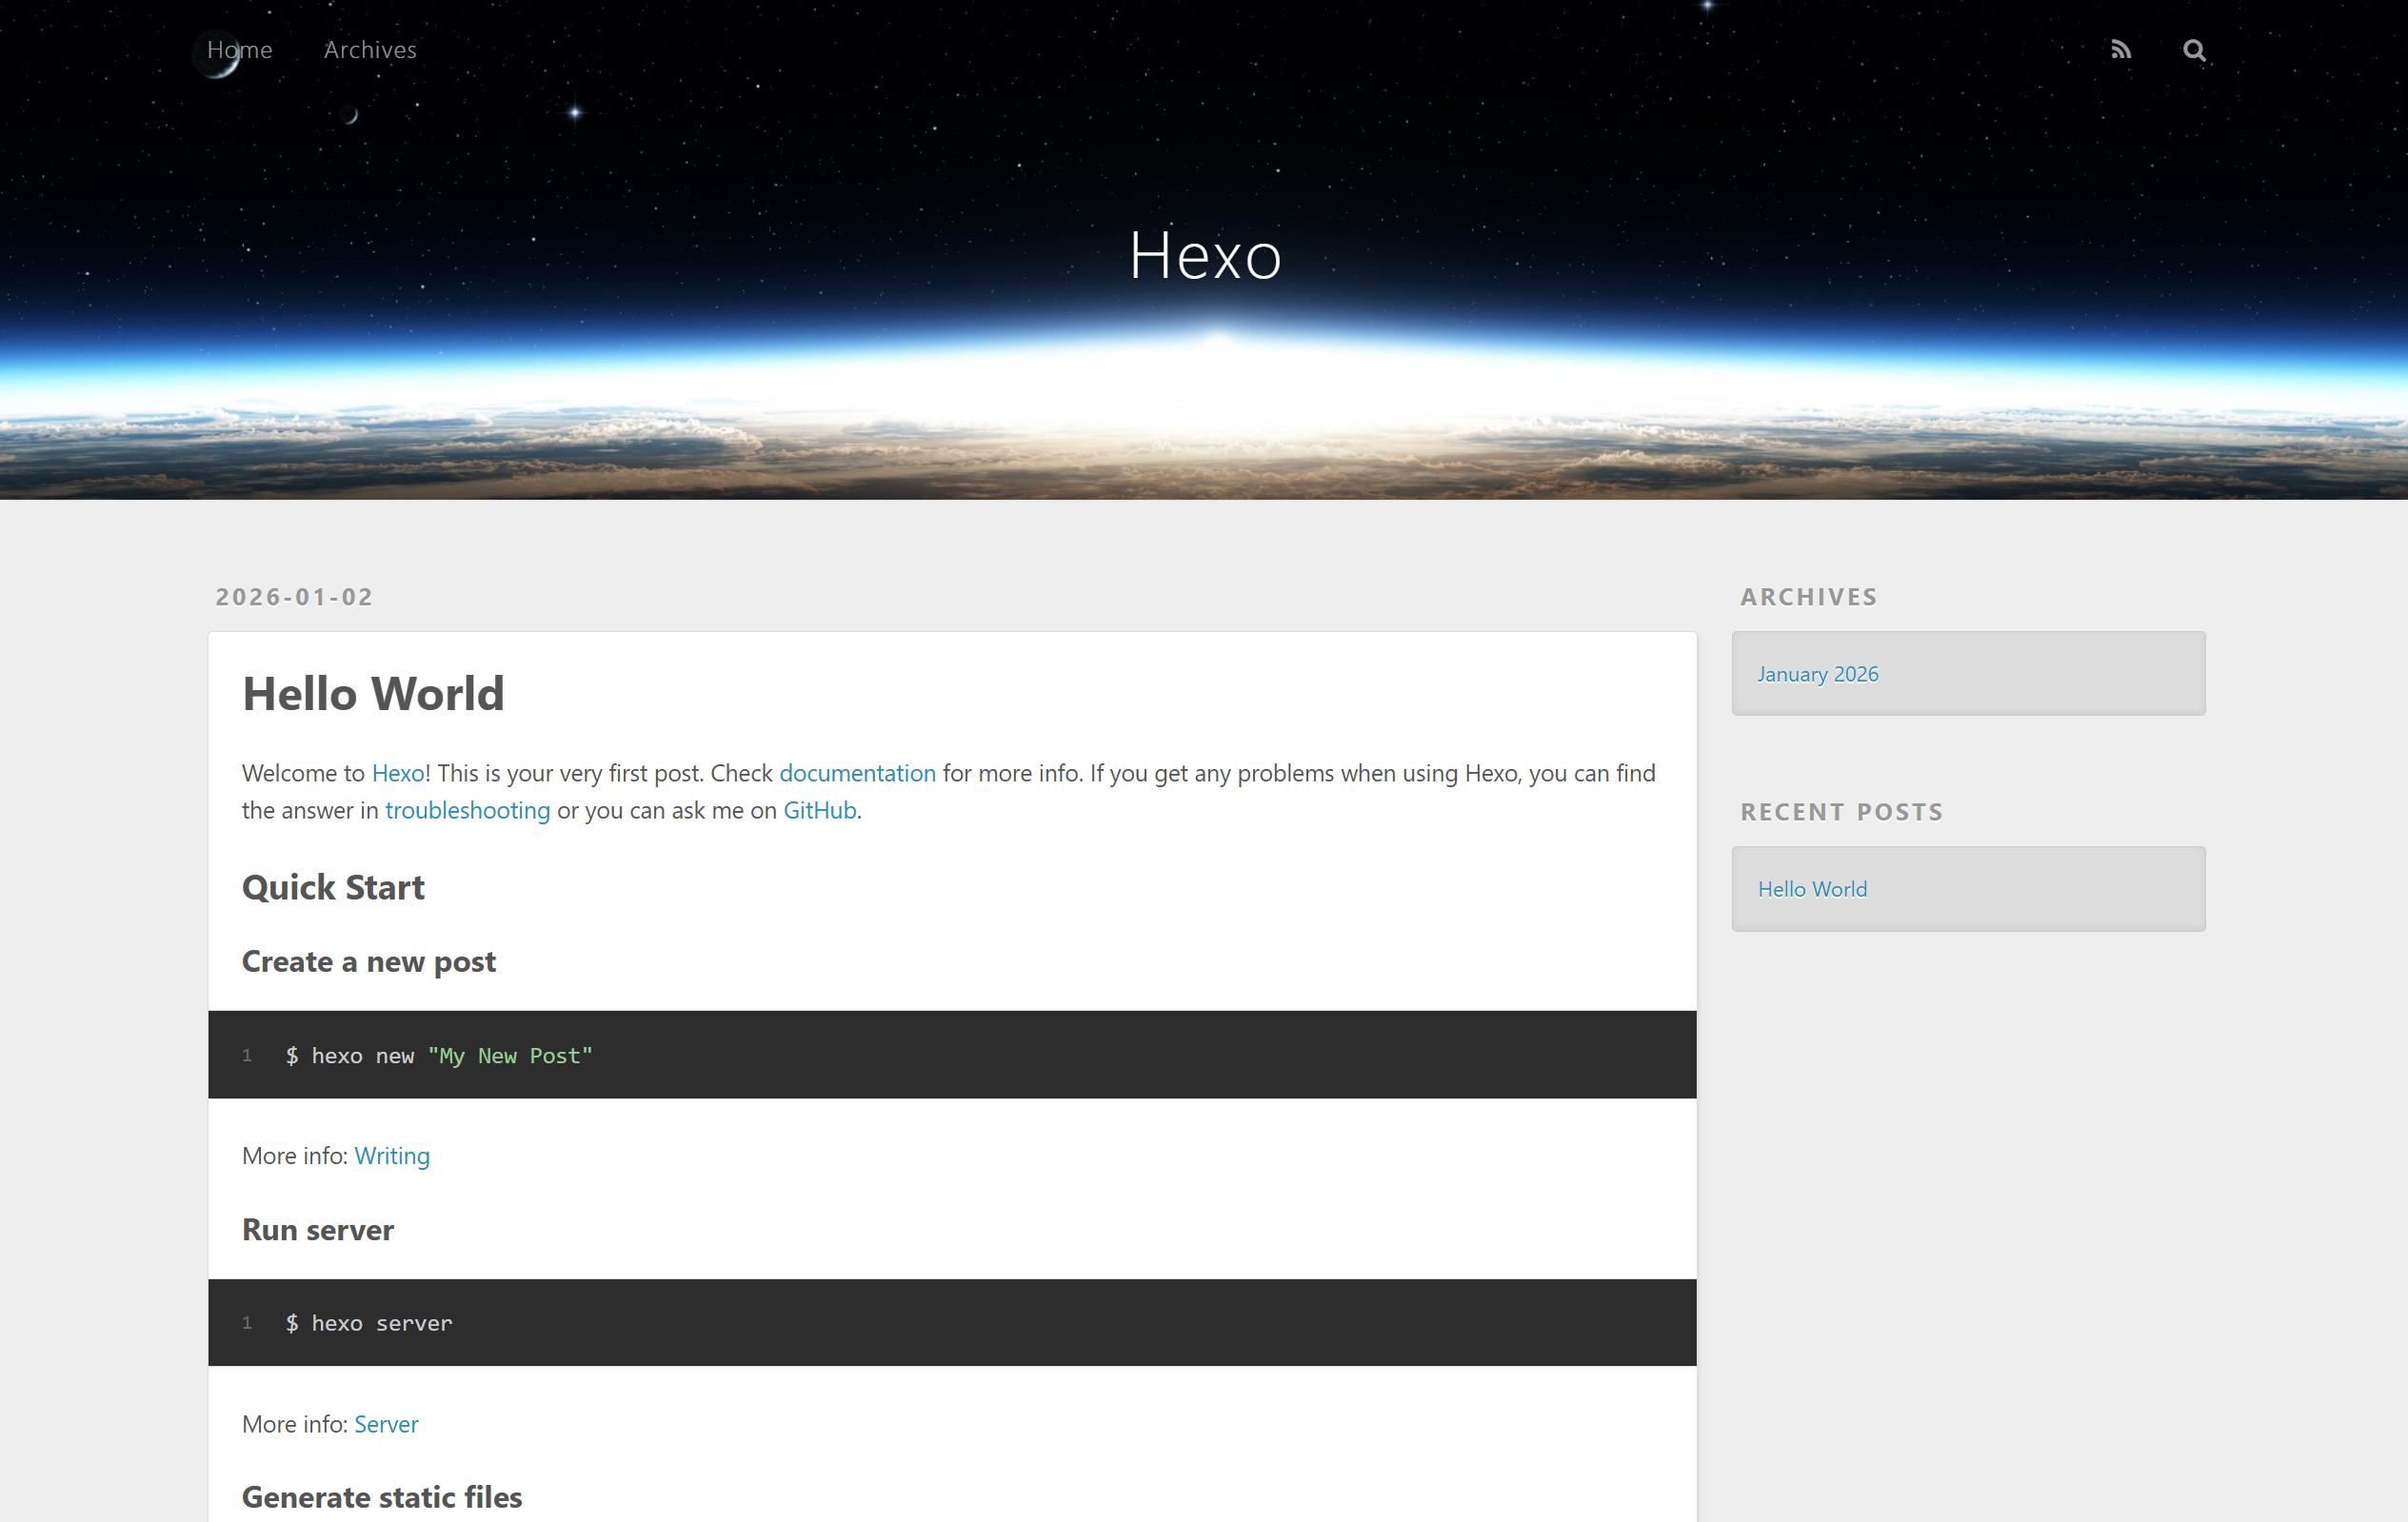
Default preview URL: http://localhost:4000
Use the following command to specify a custom port.
1 | hexo server -p <port number> |
Visit in your browser: http://localhost:4000
IV. Deploy to GitHub Pages ⚓︎
1. Install hexo-deployer-git ⚓︎
1 | npm install hexo-deployer-git --save |
Edit the _config.yml file to configure GitHub deployment settings.
1 | deploy: |
repo: URL of the target repository, available on the repository page.
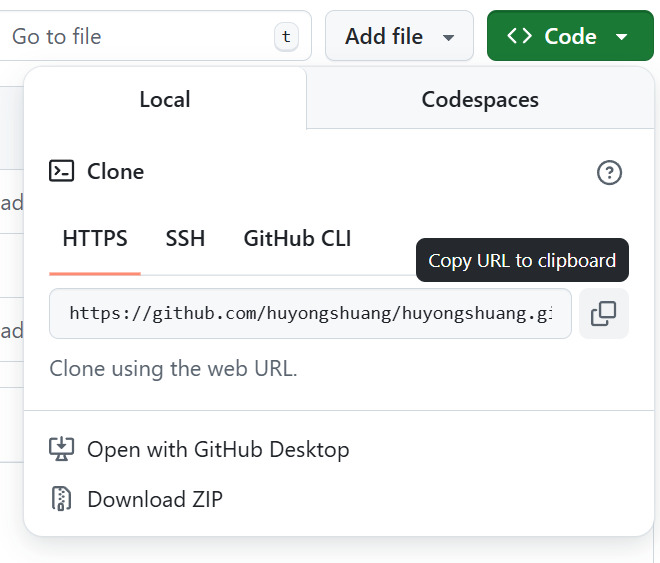
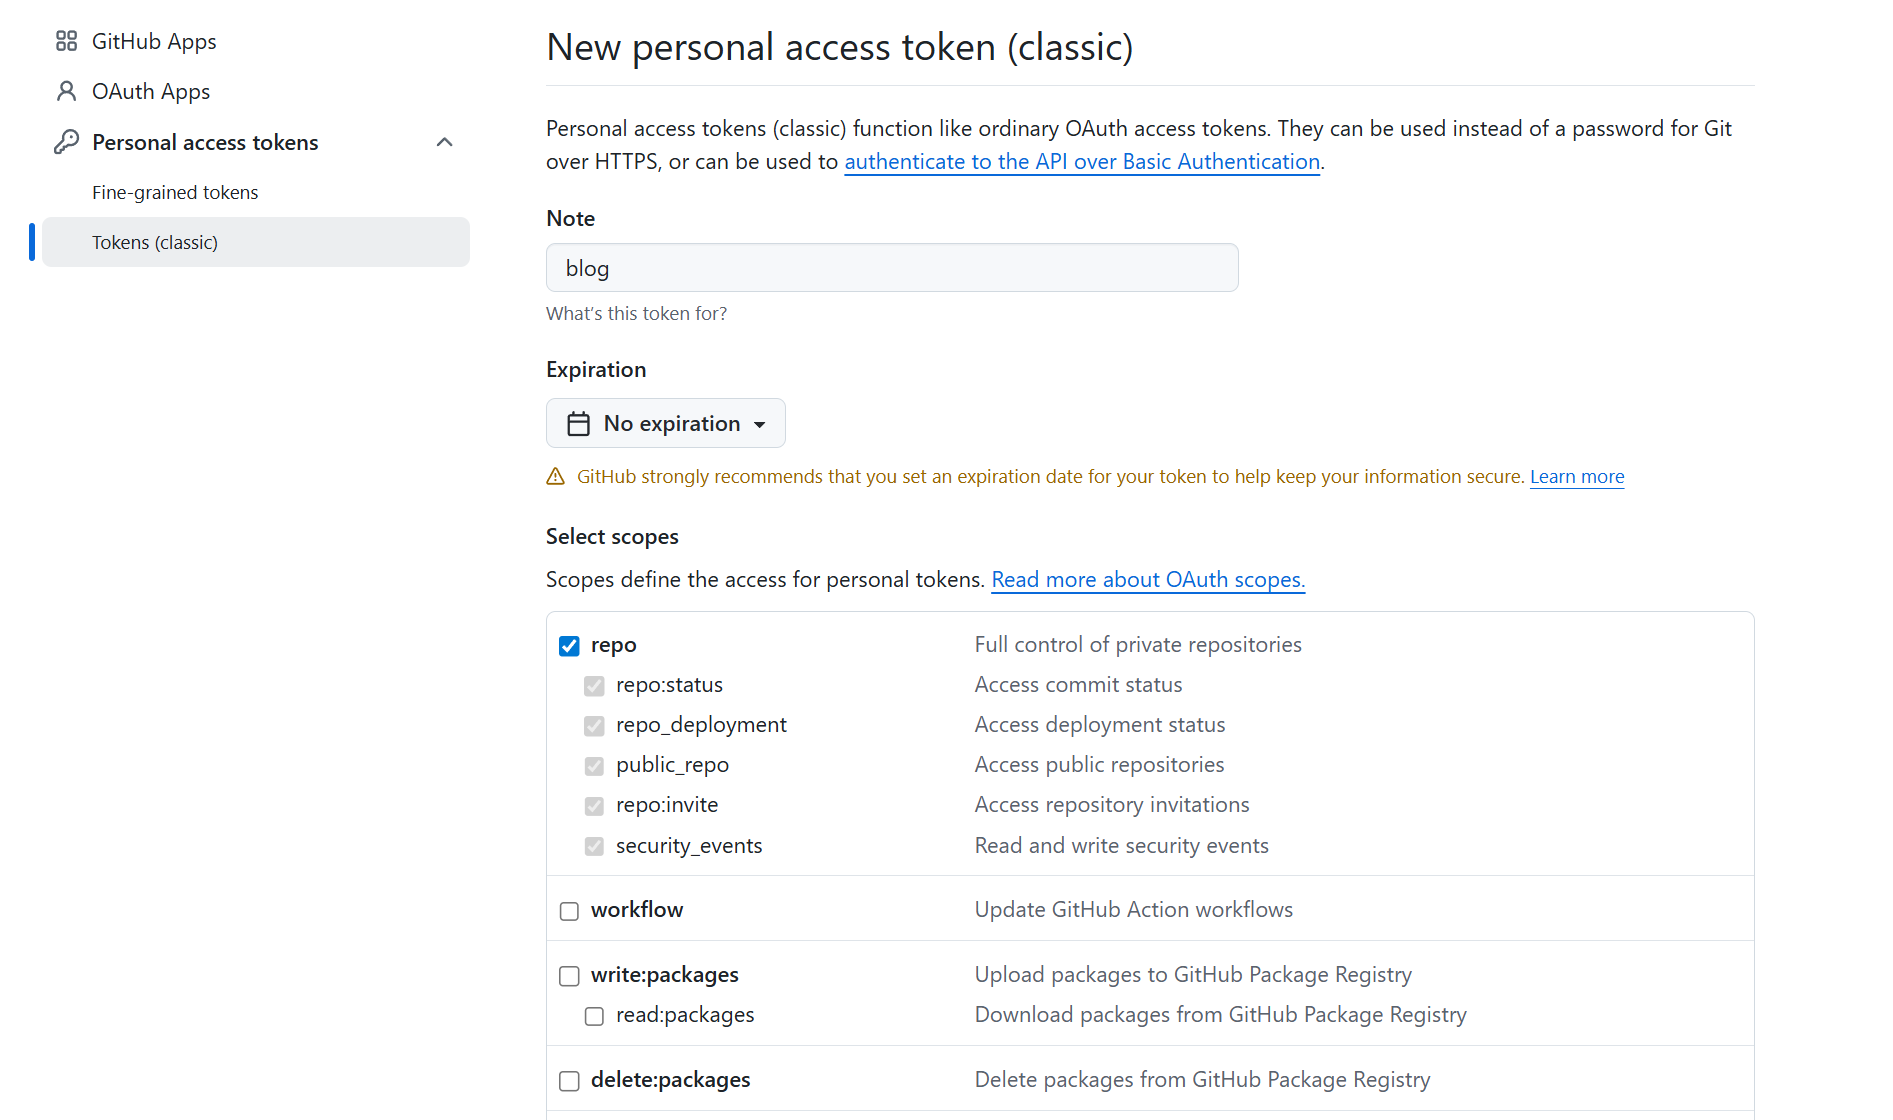
branch: Target branch name.message: Custom commit message.token: Personal access token for repository authentication. Follow the steps below to generate one:
Go to https://github.com/settings/tokens/new. As shown below, enter a note for the token in theNotefield, selectNo expirationunderExpirationto avoid expiration, check thereposcope underSelect scopes, then clickGenerate token. The full token will only be displayed once and will be hidden after you refresh the page, so be sure to save it immediately!
Deploy to GitHub Pages
1 | hexo clean |
2. Push via Git Commands ⚓︎
Push all files in the public folder to the main branch of your GitHub repository.
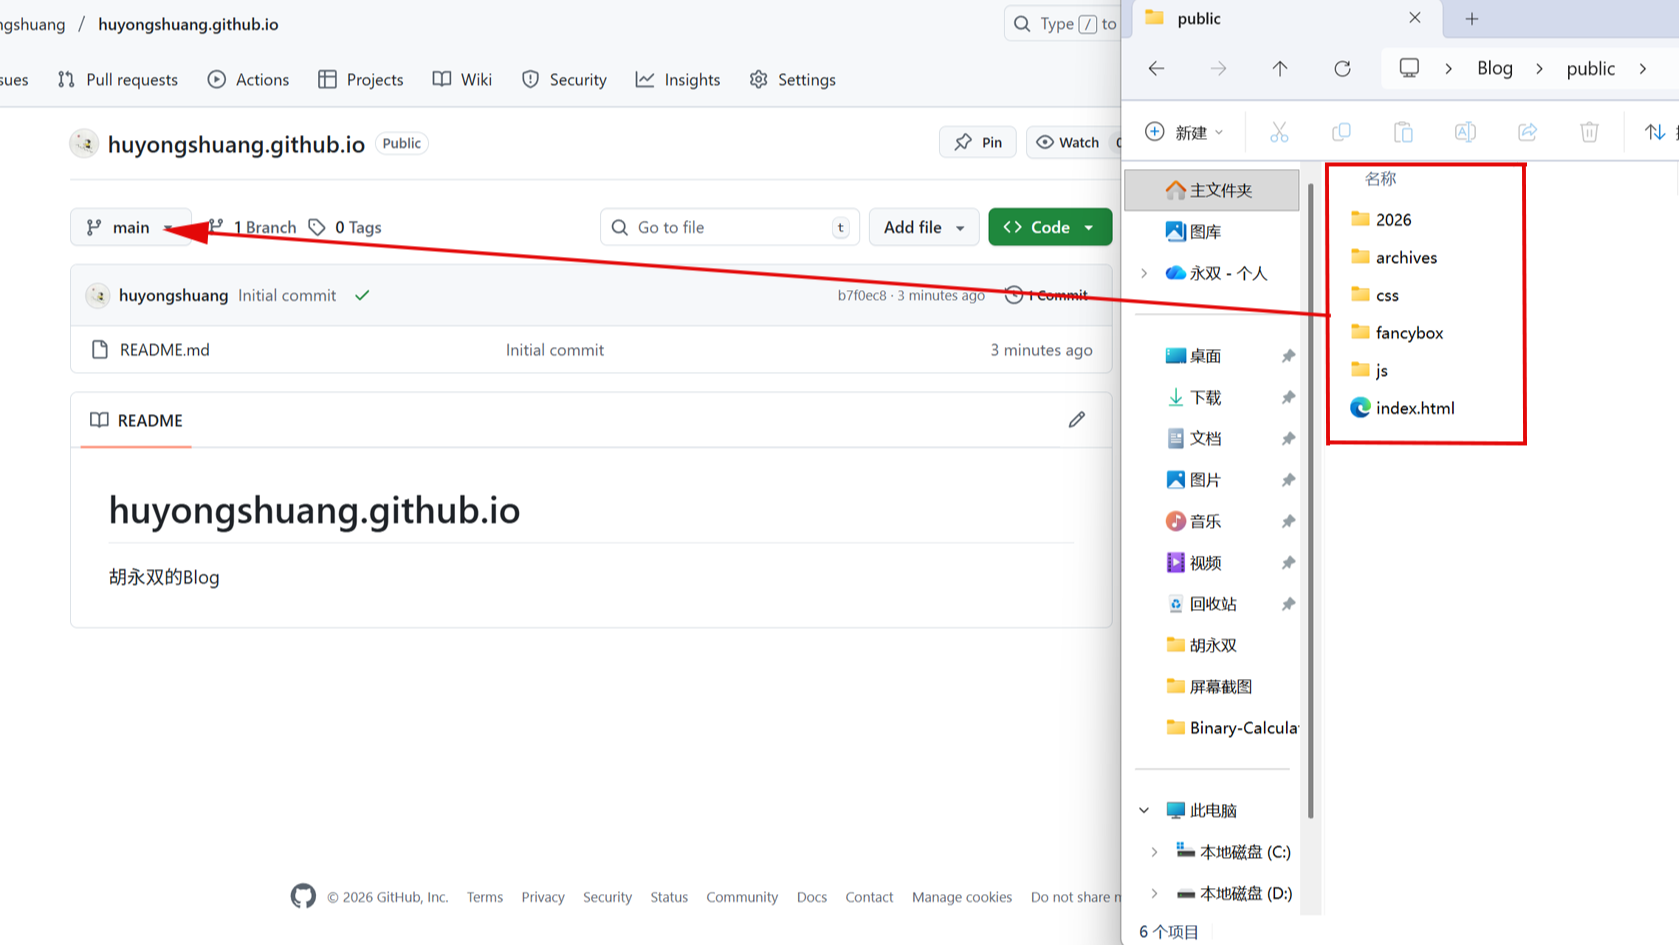
(1) Initialize a local repository
1 | git init -b main |
(2) Stage files
1 | # Stage a single file |
(3) Commit files
1 | git commit -m "Initial commit" |
(4) Link to the remote repository
1 | # Using HTTPS |
(5) Push to GitHub
1 | # First push |
(6) If there are conflicts between the remote and local repositories, run:
1 | # Pull remote changes and rebase |
Or force overwrite the remote branch:
1 | git push -u origin main --force |
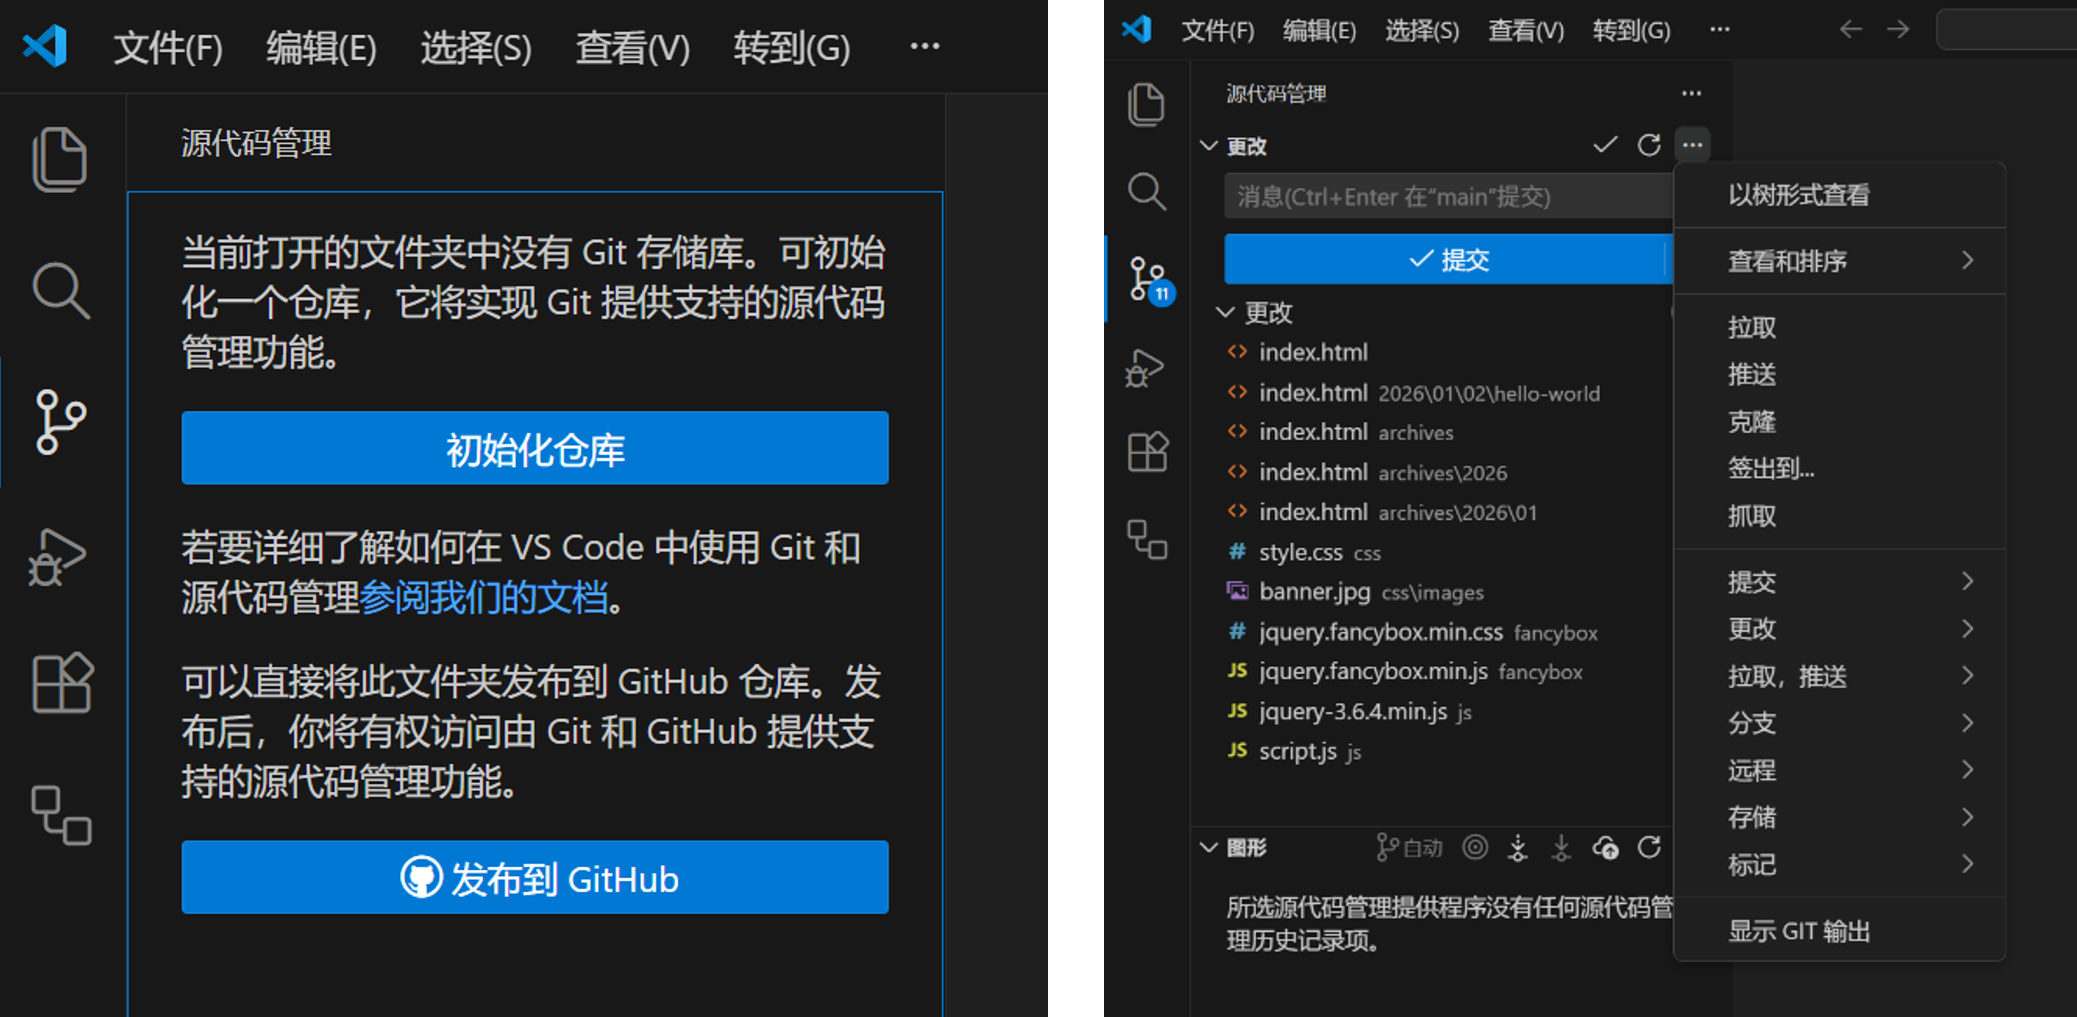
3. Push via Visual Studio Code ⚓︎
Open the public folder in Visual Studio Code, click Source Control on the left sidebar, then click Initialize Repository. Follow the steps in Method 2 above to complete the push.
After deployment, visit https://
V. Writing Posts ⚓︎
1. Post Creation Command ⚓︎
1 | hexo new [layout] <title> |
- After running the command, a Markdown file will be generated under the
source/_postsfolder. You can then start writing your post. postis the default layout. You can also use custom layouts, and change the default layout by modifying thedefault_layoutsetting in_config.yml.- Hexo has three default layouts:
post,pageanddraft. Files created with thepostlayout are saved undersource/_posts,pagelayout undersource, anddraftlayout undersource/_drafts. - Use the publish command below to move a draft to the
source/_postsfolder.
1 | hexo publish [layout] <title> |
2. Basic Markdown Syntax ⚓︎
(1) Headings ⚓︎
- Use
#for headings. The number of#symbols indicates the heading level, and there must be a space between#and the heading text.
1 | # Heading 1 |
- Placing
=or-below a line of text will render it as a level-1 heading or level-2 heading, respectively.
1 | Level 1 Heading |
(2) Text Formatting ⚓︎
- Bold
1 | **Bold text** |
- Italic
1 | *Italic text* |
- Bold + Italic
1 | ***Bold italic text*** |
- Strikethrough
1 | ~~Strikethrough text~~ |
- Underline
1 | <u>Underlined text</u> |
Preview:
① Bold text
② Italic text
③ Bold italic text
④ Strikethrough text
⑤ Underlined text
- Footnotes
① Add[^identifier]at the end of the text to annotate;
② Write[^identifier]: annotation contentanywhere in the document (usually at the end).
1 | The road ahead is long and far; I shall search high and low for truth.[^1] |
Preview:
The road ahead is long and far; I shall search high and low for truth.[1] [2]
(3) Lists ⚓︎
- Unordered Lists
Start lines with-,+or*, with a space between the symbol and text. Nested lists are supported (indent by 2 spaces or 1 Tab for nesting).
1 | - Unordered item 1 |
Preview:
- Unordered item 1
- Nested subitem 1
- Nested subitem 2
- Unordered item 2
- Unordered item 3
- Ordered Lists
Start lines withnumber., with a space between the number and text. Nested lists are also supported.
1 | 1. Ordered item 1 |
Preview:
-
Ordered item 1
1. Nested subitem 1
2. Nested subitem 2 -
Ordered item 2
-
Ordered item 3
-
Task Lists
Use- [ ]for incomplete tasks and- [x]for completed tasks. Thespaceandxinside the brackets are key:[ ]and[x].
1 | - [ ] Todo item 1 |
Preview: [3]
(4) Blockquotes ⚓︎
Use > for blockquotes. Nesting is supported (each additional > adds one nesting level).
1 | > Level 1 quote |
Preview:
Level 1 quote
Level 2 quote
Level 3 quote
(5) Tables ⚓︎
Use | to separate columns, - to separate the header from content. : controls alignment: :--- for left-aligned, ---: for right-aligned, :---: for centered.
1 | | Name | Age | Occupation | |
Preview:
| Name | Age | Occupation |
|---|---|---|
| Zhang San | 25 | Programmer |
| Li Si | 30 | Designer |
(6) Horizontal Rules ⚓︎
Create a horizontal rule with three or more *, - or _ on a single line (no other content allowed on the line).
1 | --- |
Preview:
- Note:
A line of text immediately followed by---will be parsed as an<h2>level-2 heading. When using---as a horizontal rule, leave a blank line before and after it, or use***or___instead.
If you write***,---,___consecutively without blank lines between them, the parser will merge them into a single horizontal rule<hr>instead of multiple separate lines.
(7) Links ⚓︎
- Standard Links
Syntax:[link text](link URL "optional tooltip text")
1 | [Baidu](https://www.baidu.com "Click to go to Baidu") |
Preview: Baidu
- Anchor Links (jump to headings within the document)
Syntax:[Jump to Heading 1](#heading-1)(the heading text must exactly match the target heading, including case and spaces)
1 | [Back to top](#I-Preparations) |
Preview: Back to top [4]
- Image Links
Syntax:(alt text is required, displayed when the image fails to load)
1 |
Preview:
(8) Code ⚓︎
- Inline Code
Wrap text with backticks`, suitable for single-line code or code snippets.
1 | This is inline code: `print("Hello Markdown")` |
Preview:
This is inline code: print("Hello Markdown")
- Code Blocks
Wrap content with three backticks
1 | ```python |
Preview:
1 | # This is a Python code block |
- Nested Code Blocks
Use four or more backticks````to wrap content that contains three backticks, achieving nested code blocks.
1 | ````markdown |
Preview:
1 | ```python |
3. Insert Assets ⚓︎
Modify the _config.yml file to automatically create an asset folder when a new post is created.
1 | post_asset_folder: true |
After running hexo new post Blog, an asset directory with the same name as the post will be generated under the source/_posts folder.
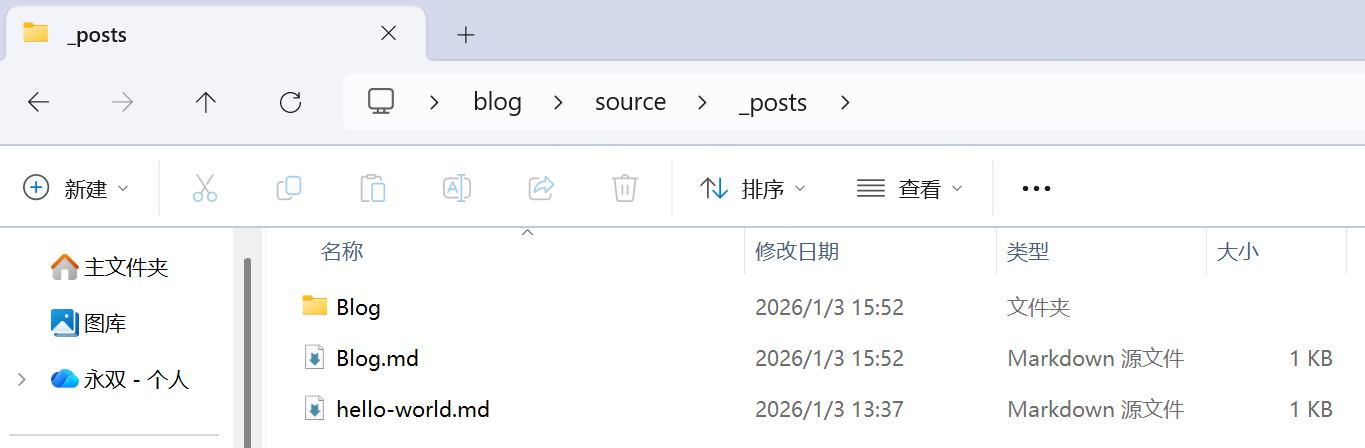
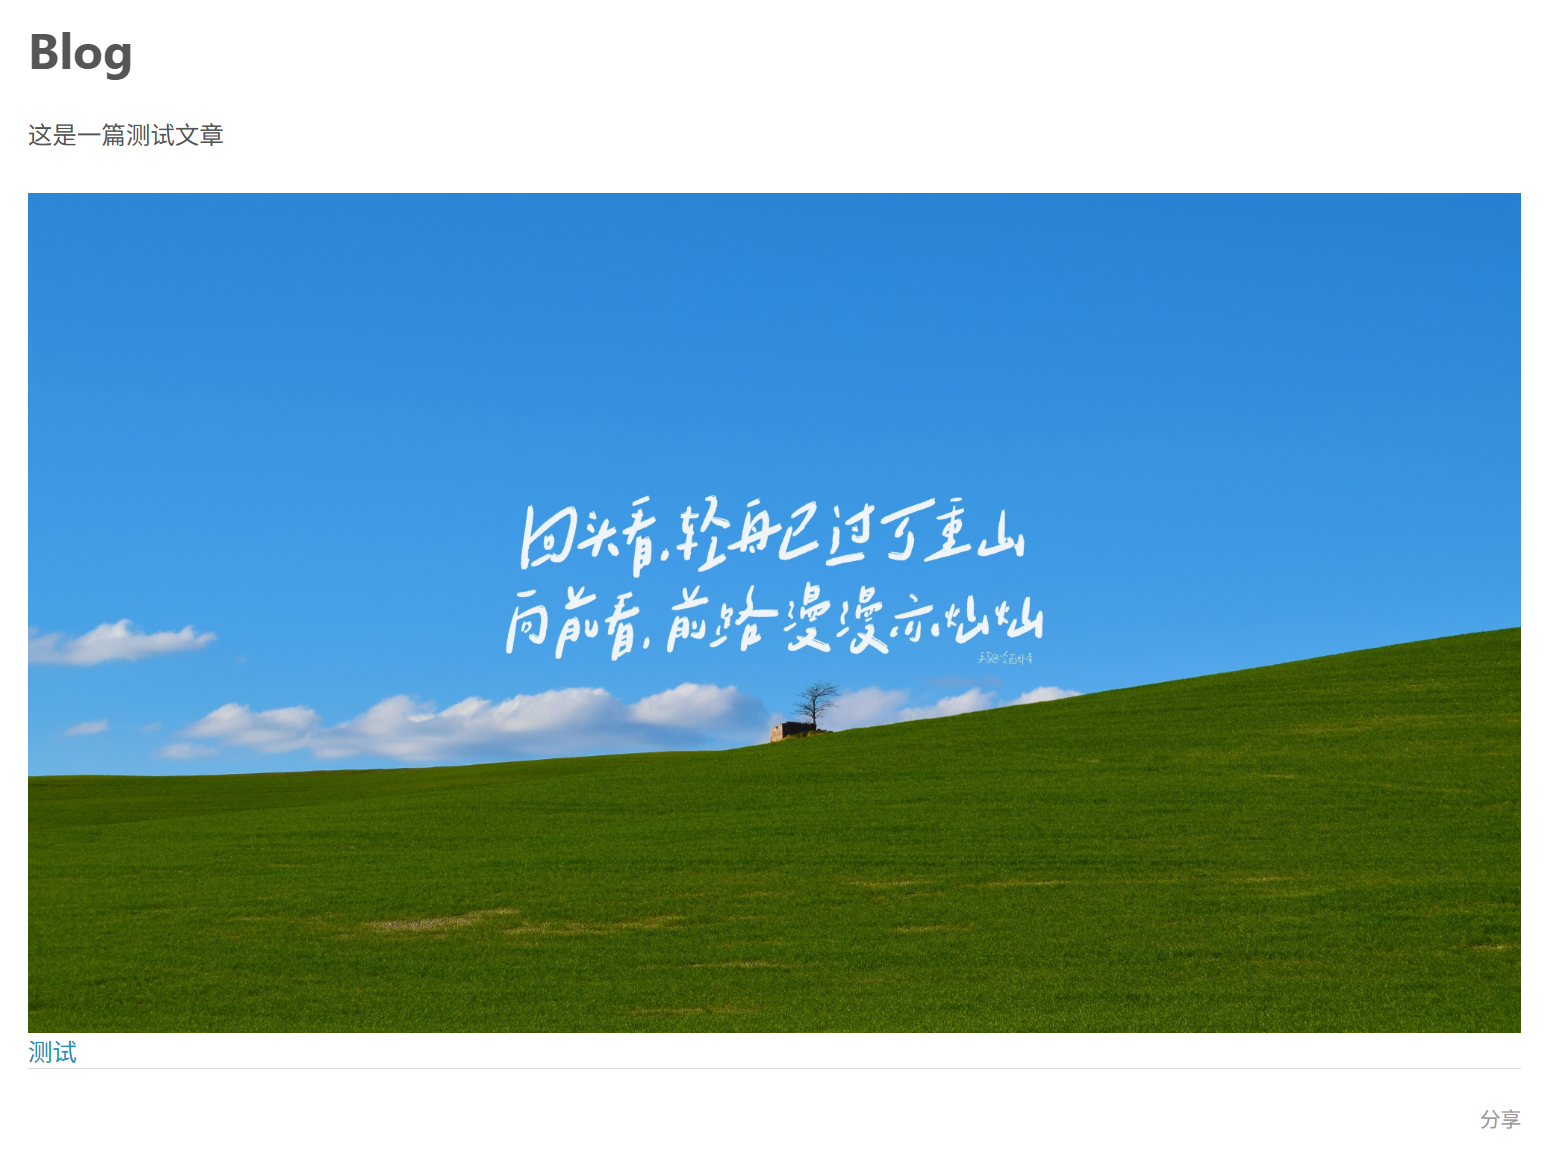
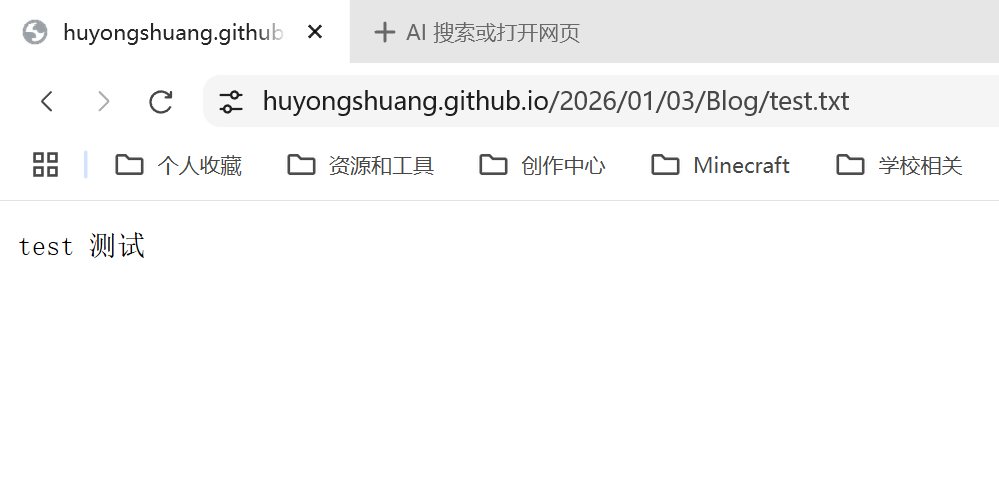
Add an image and a txt file to the Blog folder.
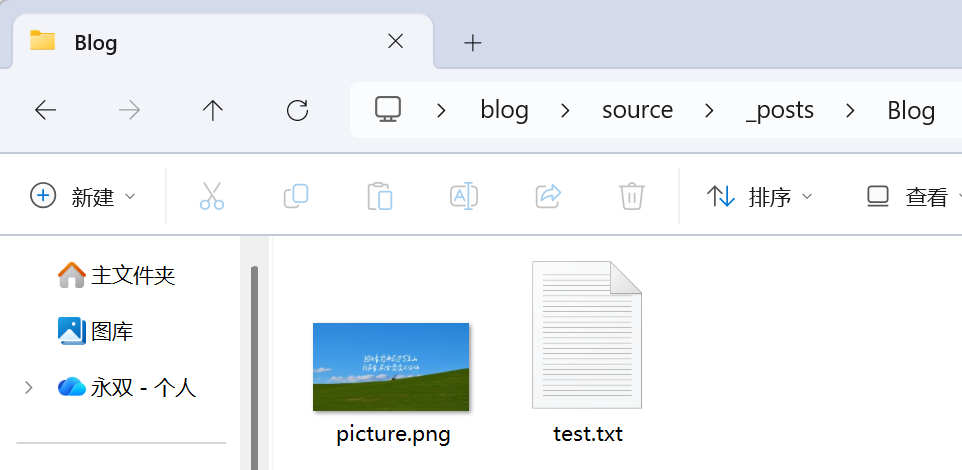
Add the following content to the Markdown file:
1 | {% asset_img picture.png Image %} |
After deployment, you will see the image on your site. Click Test to open the txt file.
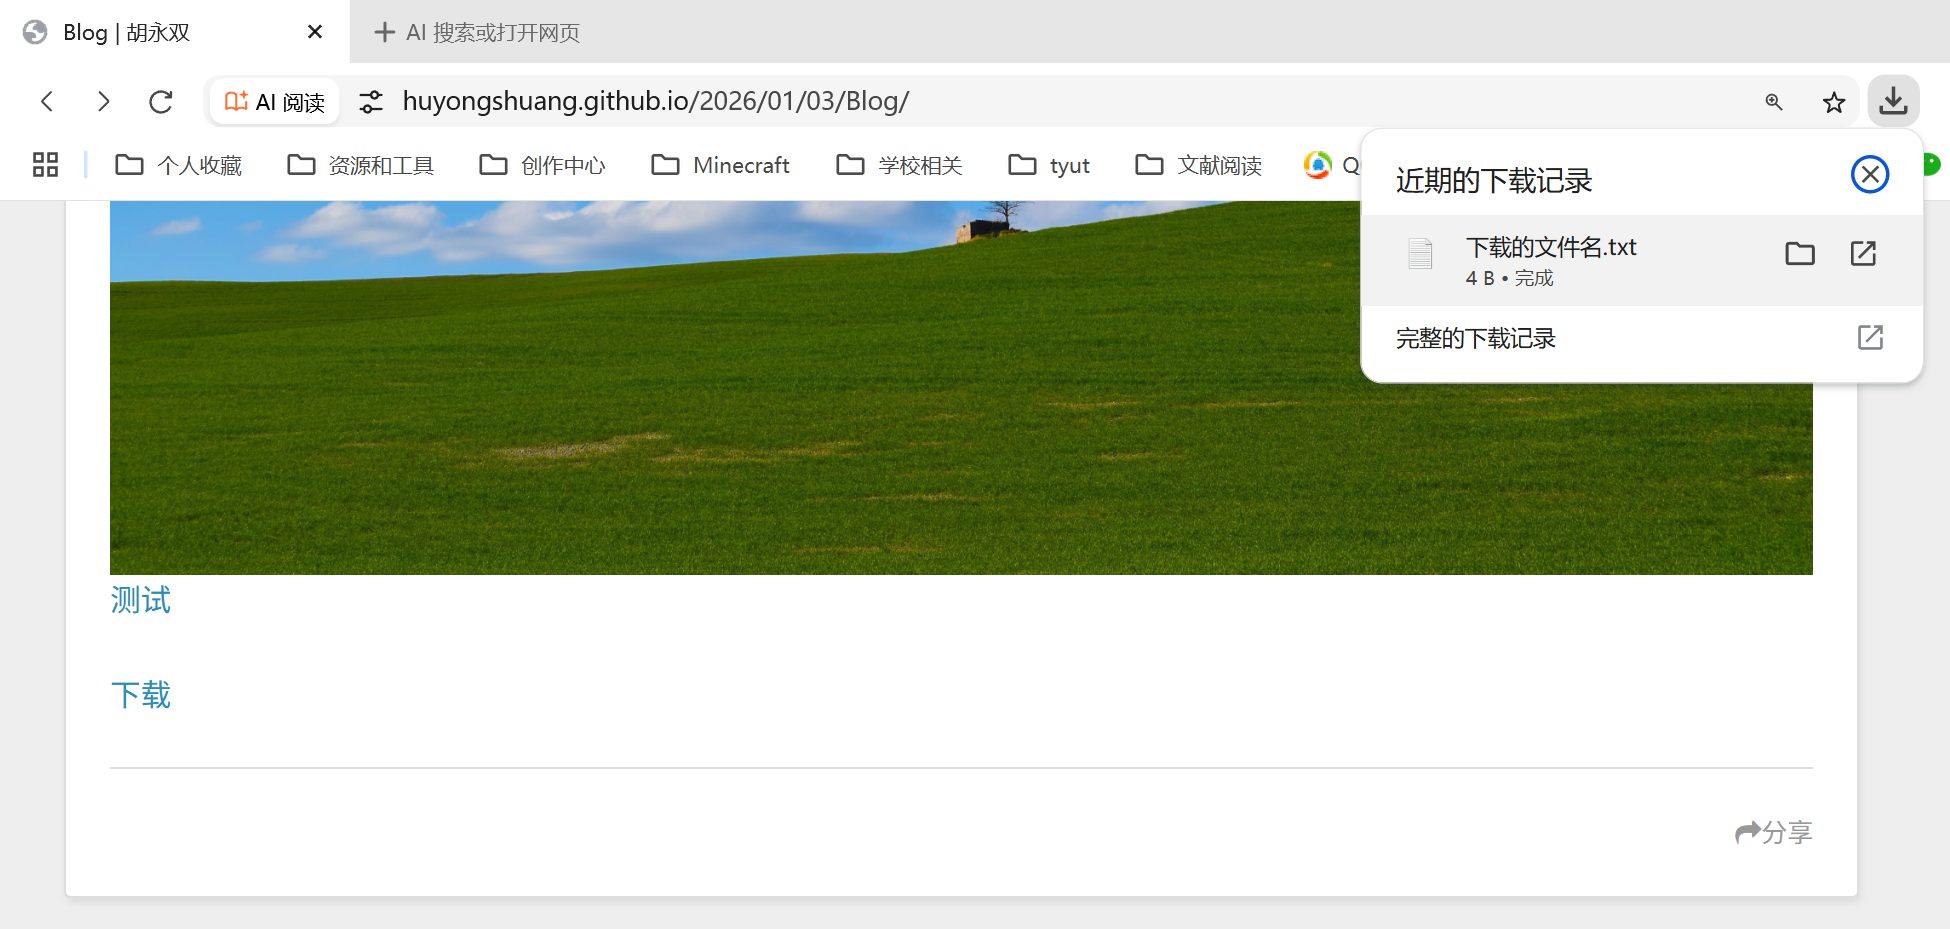
To make the file downloadable on click, use the following content:
1 | <a href="{% asset_path test.txt %}" download="downloaded-file.txt">Download</a> |
As shown below, the file can be downloaded successfully:
4. Front-matter ⚓︎
Front-matter is the configuration block at the beginning of a Markdown file for post settings.
1 |
|
- Settings & Default Values:
| Setting | Description | Default Value |
|---|---|---|
| layout | Layout | config.default_layout |
| title | Post title | Post filename |
| date | Creation date | File creation date |
| updated | Update date | File update date |
| comments | Enable comment feature for the post | true |
| tags | Tags (not applicable to pages) | |
| categories | Categories (not applicable to pages) | |
| permalink | Override the post permalink, must end with / or .html | null |
| excerpt | Plain text post excerpt | |
| disableNunjucks | Disables rendering of Nunjucks tags and tag plugins when enabled | false |
| lang | Set language to override auto-detection | Inherited from _config.yml |
| published | Whether the post is published | true for posts under _posts, false for drafts under _drafts |
Notes ⚓︎
The journey in pursuit of truth is a long one, but I will persevere and spare no effort in seeking and exploring. This line expresses the poet’s unwavering courage and determination in the pursuit of truth, embodying perseverance and unshakable integrity. ↩︎
If the footnotes cannot be rendered, you can switch to another rendering engine, such as
hexo-renderer-kramed. ↩︎The display issue here is caused by the Markdown renderer, not related to the syntax. ↩︎
Using a non-default rendering engine such as
hexo-renderer-kramedto render Markdown might cause anchor links to fail to navigate. You can use absolute links like[Back to Top](/en/2024/10/1-Hexo-1/#I-Preparations)or revert to the default rendering enginehexo-renderer-marked. ↩︎
 Wechat
 Alipay
Wechat Official Account has more content!